Working with pipelines
A pipeline can be created and managed in three ways: through the Pipeline UI directly in the platform, using the Python SDK, or by providing a JSON definition.
A pipeline has the following properties:
- a logical keyidentifier of maximum 32 characters (required)
- a link to a template (required)
- a set of variables (optional)
- a list of steps (required)
Creating a Pipeline from the UI
Navigate to AI Lab > Pipelines and click + Add to create a new pipeline. Set the pipeline key and optionally assign a template if you want to reuse the pipeline across multiple assets.
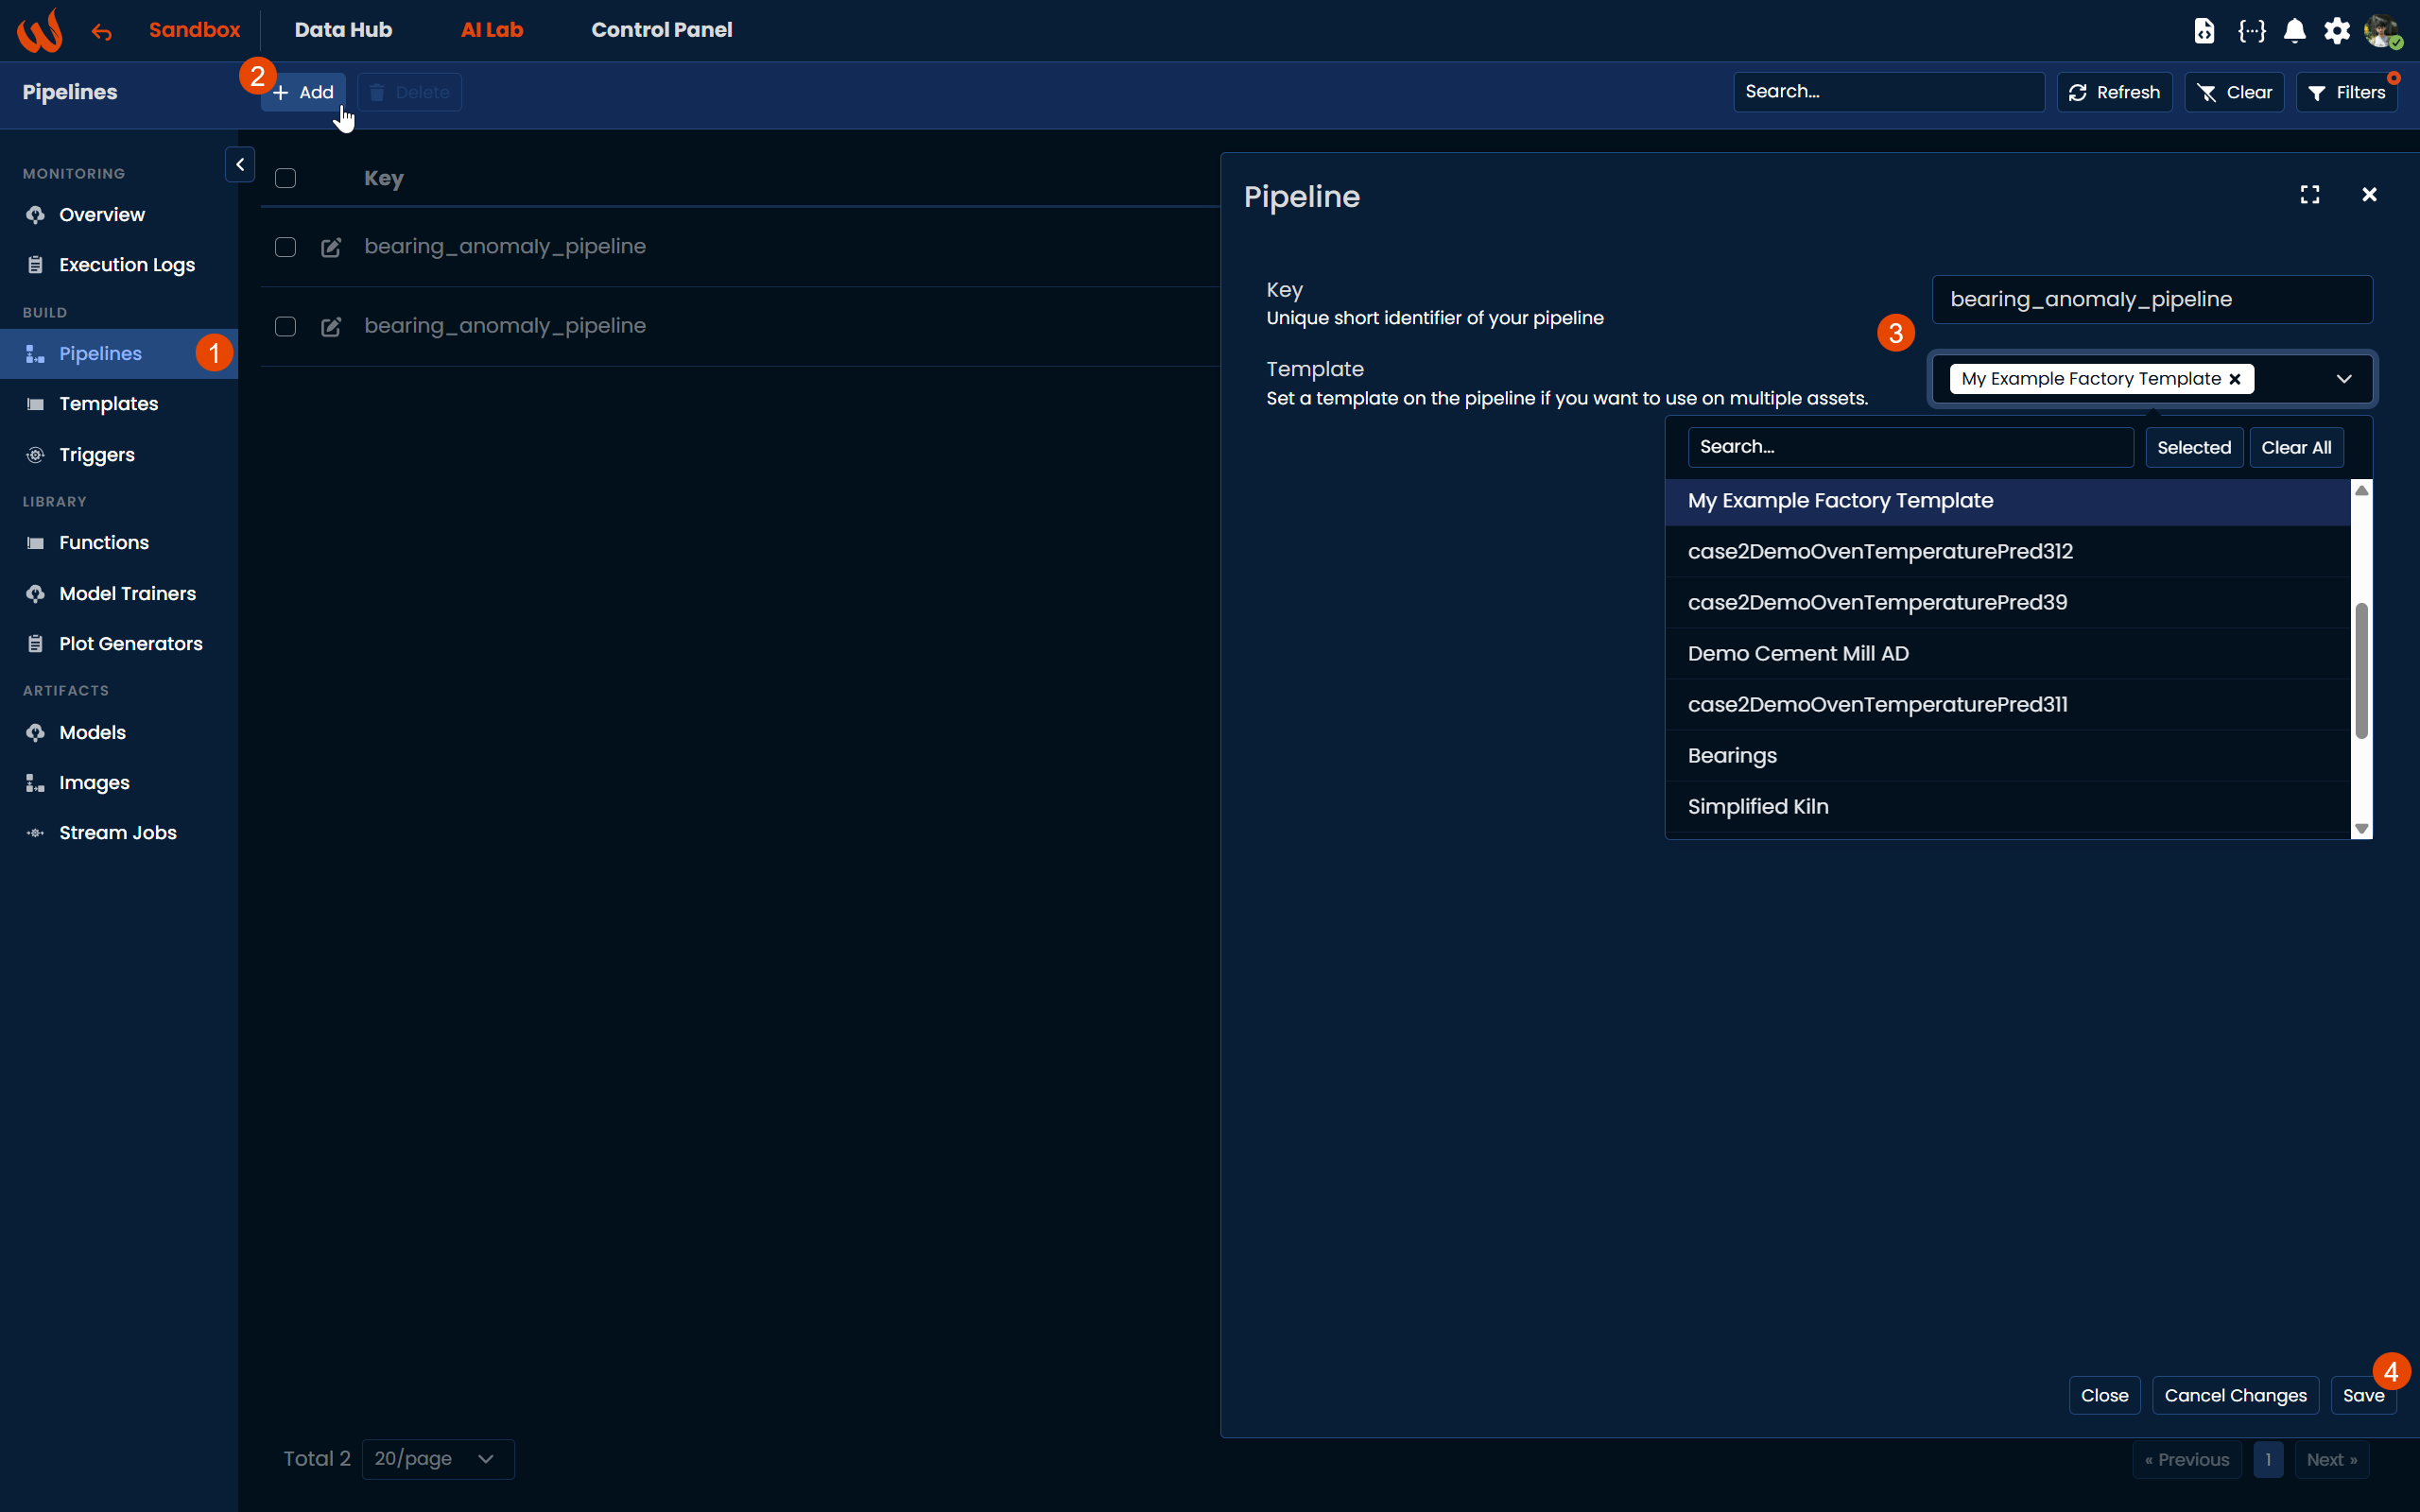
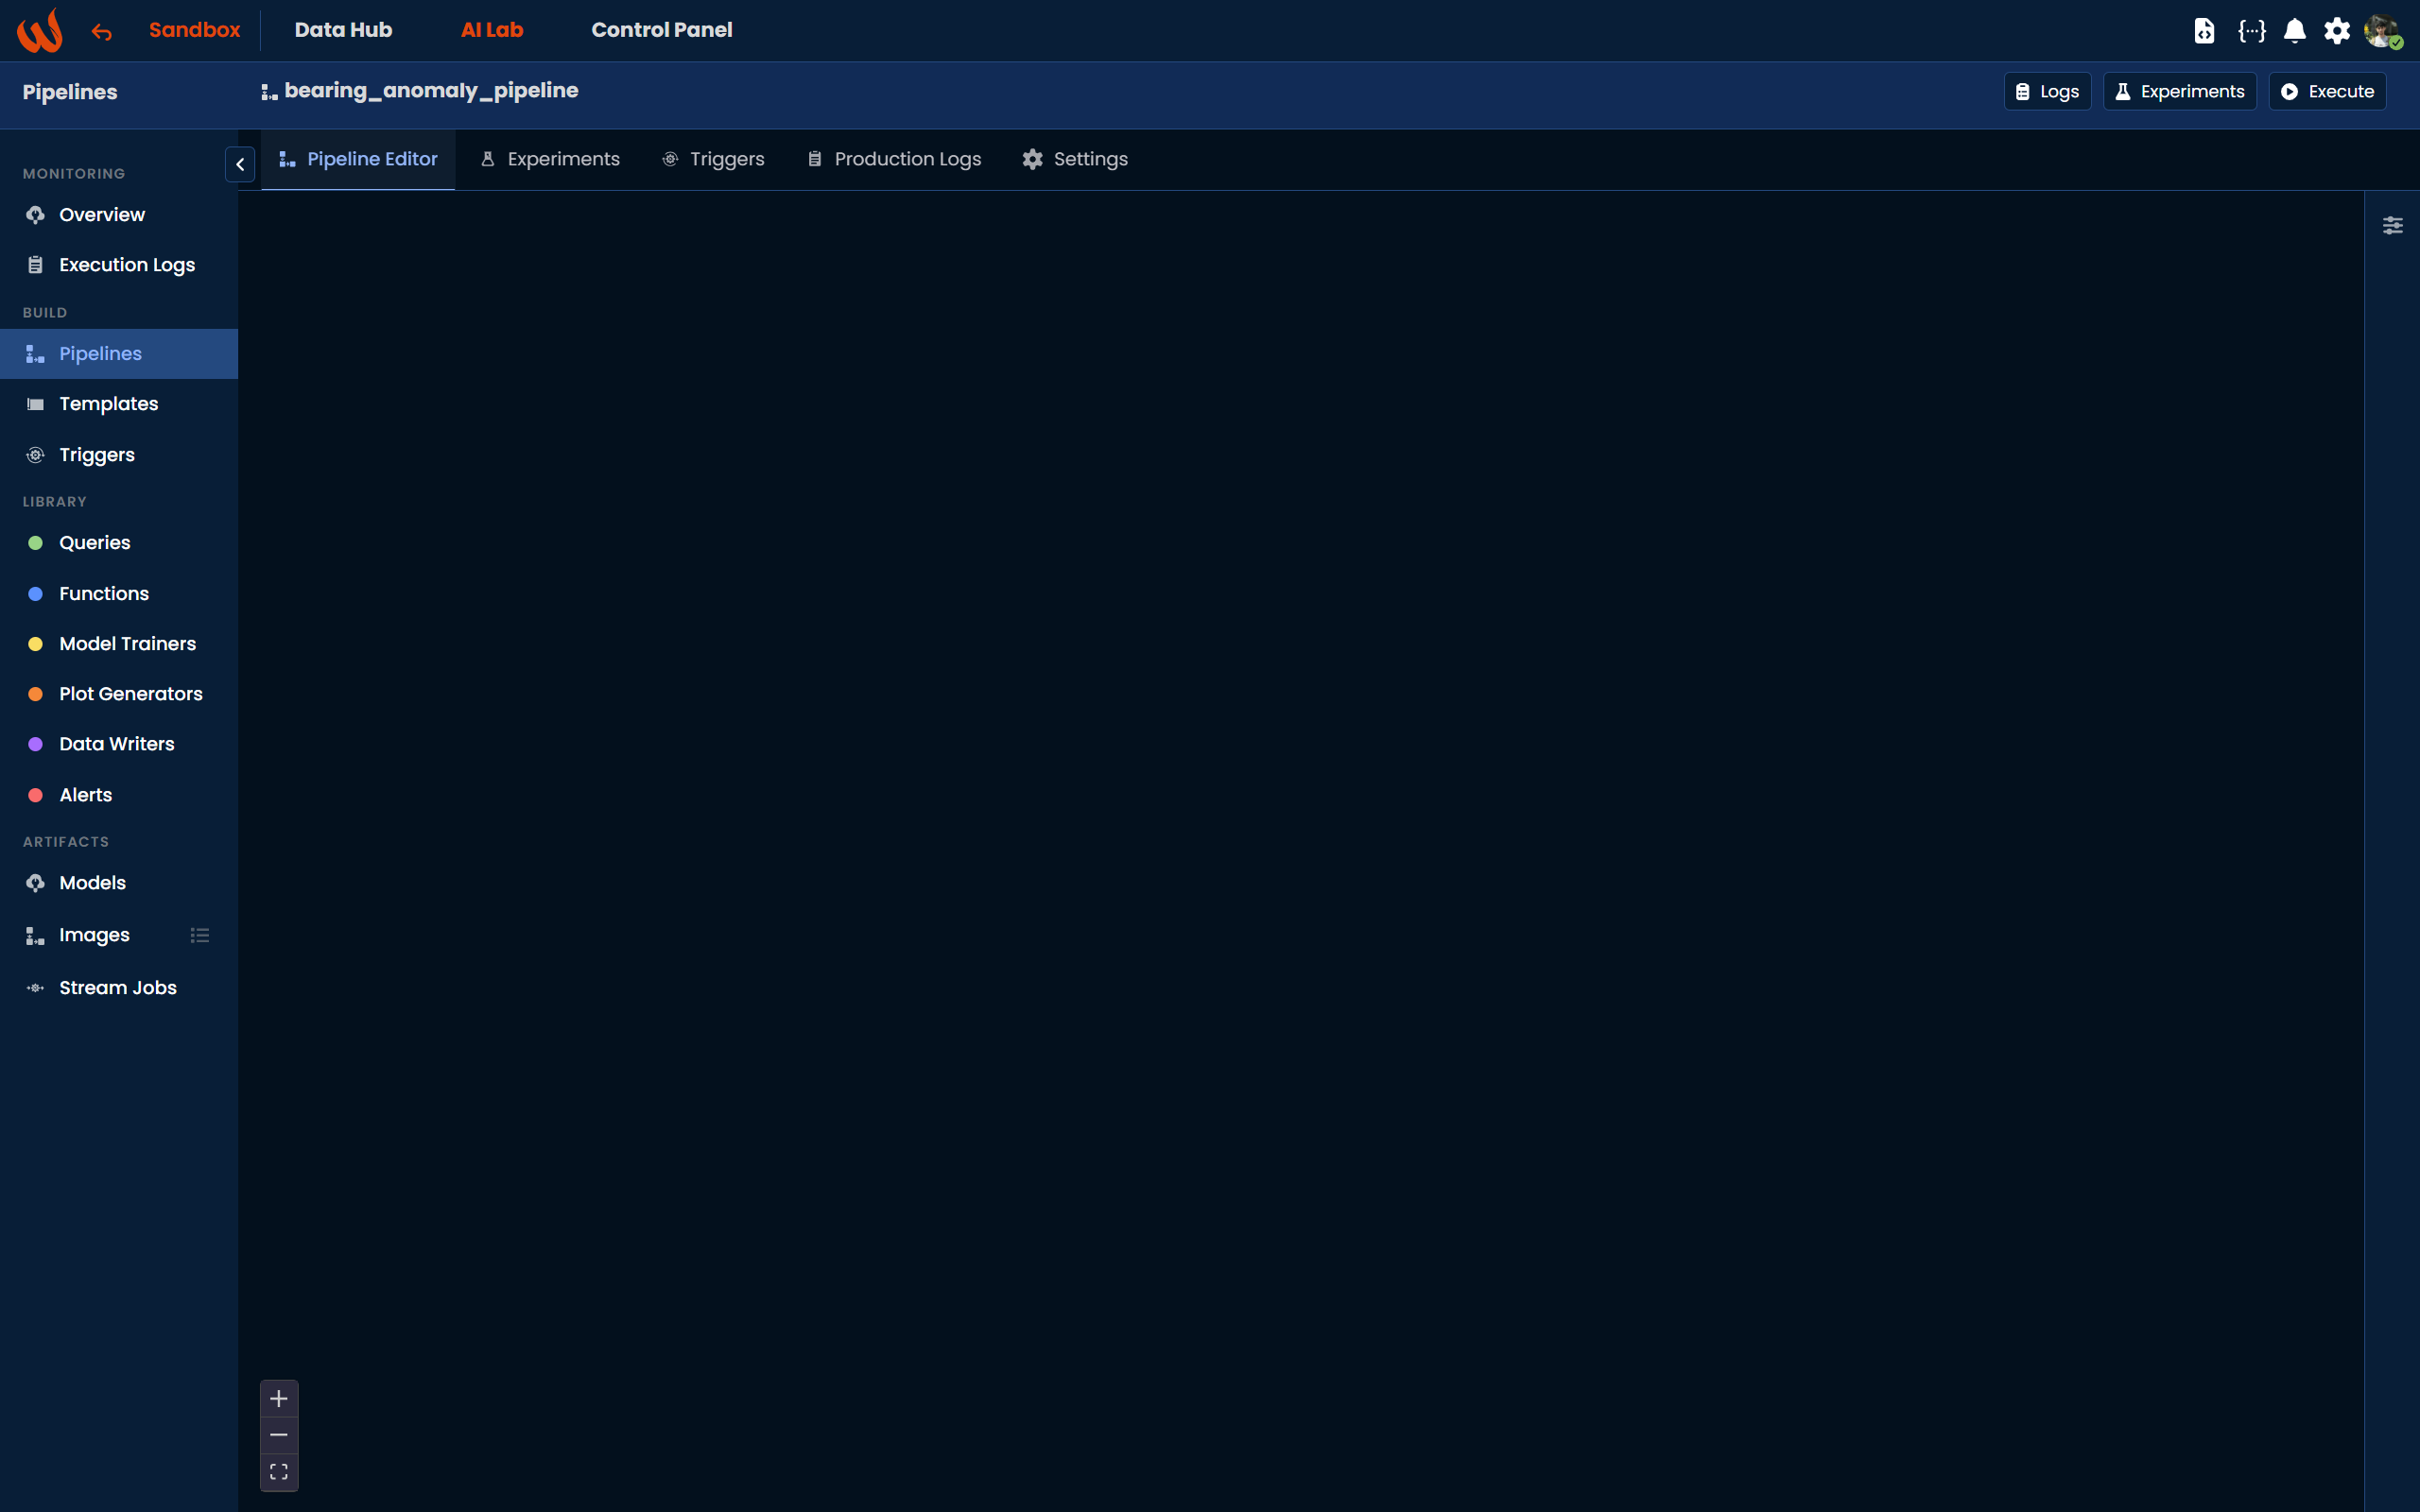
Once saved, you are automatically redirected to the Pipeline Editor, a block-based canvas where you can visually compose your pipeline by dragging and dropping steps from the Library panel on the left. Each block represents a step and can be connected to the next through named output and input blocks.
For a step-by-step walkthrough of building a complete pipeline using the Pipeline UI, refer to the Tutorial: Anomaly Detection Solution tutorial.
Pipeline steps
Pipeline steps are connected together by their inputs and outputs and must form a unique path. You need to follow these principles:
- A pipeline must have at least one step without input as a starting point (e.g. a Query step).
- Each input must be connected to one and only output. But same output can be used as input of multiple different steps.
- Depending on their type, some steps may not have inputs or outputs and may have specific rules to follow.
Data used and transferred during execution of a pipeline are not stored. You must use a Plot step to produce data visualizations or a Write step to store data inside the platform.
Starting from v12.0, steps can be connected visually in the Pipeline Editor by dragging blocks from the Library panel and linking them through named output and input blocks. They can also be defined programmatically using Python or JSON.
Available step types are:
- Query step: queries time-series data and produces a dataframe.
- Script step: executes any Python function, e.g. a transformation or a call to a third-party service.
- Model step: defines how to train or run inference on a machine learning model.
- Write step: writes results back to the platform as datapoints.
- Plot step: defines how to visualize your data during experiments.
Creating a Pipeline from Python or JSON
You can also create or update a pipeline programmatically using the Python SDK or by providing a JSON definition directly.
import wizata_dsapi

pipeline = wizata_dsapi.Pipeline(
    key="my_pipeline",
    template_id=uuid.UUID('639e7537-0d80-4056-9670-06a63870d386'),
    variables={
        "var1": "string",
        "from": "relative",
        "to": "relative"
    }
)
pipeline.add_query(
    request=wizata_dsapi.Request(
        datapoints=['dp1','dp2','dp3'],
        interval=60000,
        agg_method='mean',
        start="@from",
        end="@to"
    ),
    df_name="query_output"
)
pipeline.add_transformation(
    script="my_script",
    input_df_names=['query_output'],
    output_df_names=['transform_data']
)
pipeline.add_model(
    config=wizata_dsapi.MLModelConfig(
        model_key='my_model_key',
        train_script='linear_reg_sc',
        features=['dp1', 'dp2'],
        target_feat='dp3',
    ),
    input_df='transform_data',
    output_df='predicted_data'
)
pipeline.add_writer(
    config=wizata_dsapi.WriteConfig(
        datapoints={
            'predicted_dp': 'dp_output'
        }
    ),
    input_df='predicted_data'
)
pipeline.add_plot(
    df_name='predicted_data',
    script='describe_df'
)
wizata_dsapi.api().upsert_pipeline(pipeline)
{
"key": "my_pipeline",
"templateId": "639e7537-0d80-4056-9670-06a63870d386",
"steps": [
{
"type": "query",
"config": {
"equipments_list": [
{
"id": null,
"datapoints": [
"dp1",
"dp2",
"dp3"
],
"shift": "0s"
}
],
"timeframe": {
"start": "@from",
"end": "@to"
},
"aggregations": {
"agg_method": "mean",
"interval": 60000
},
"filters": {},
"options": {}
},
"inputs": [],
"outputs": [
{
"dataframe": "query_output"
}
]
},
{
"type": "script",
"config": {
"function": "my_script"
},
"inputs": [
{
"dataframe": "query_output"
}
],
"outputs": [
{
"dataframe": "transform_data"
}
]
},
{
"type": "model",
"config": {
"train_script": "linear_reg_sc",
"train_test_split_pct": 1,
"train_test_split_type": "ignore",
"target_feat": "dp3",
"features": [
"dp1",
"dp2"
],
"model_key": "my_model_key",
"output_property": "result",
"function": "predict"
},
"inputs": [
{
"dataframe": "transform_data"
}
],
"outputs": [
{
"dataframe": "predicted_data"
}
]
},
{
"type": "write",
"config": {
"datapoints": {
"predicted_dp": "dp_output"
}
},
"inputs": [
{
"dataframe": "predicted_data"
}
],
"outputs": []
}
],
"variables": {
"var1": "string",
"from": "relative",
"to": "relative"
}
}For the full Python SDK reference, see the Pipeline SDK documentation.
Using a JSON definition, you can load and upsert a pipeline from a file:
import wizata_dsapi
import json

with open('your_pipeline.json', 'r') as f:
    pipeline_dict = json.load(f)
pipeline = wizata_dsapi.Pipeline()
pipeline.from_json(pipeline_dict)
wizata_dsapi.api().upsert_pipeline(pipeline)
Deleting a pipeline
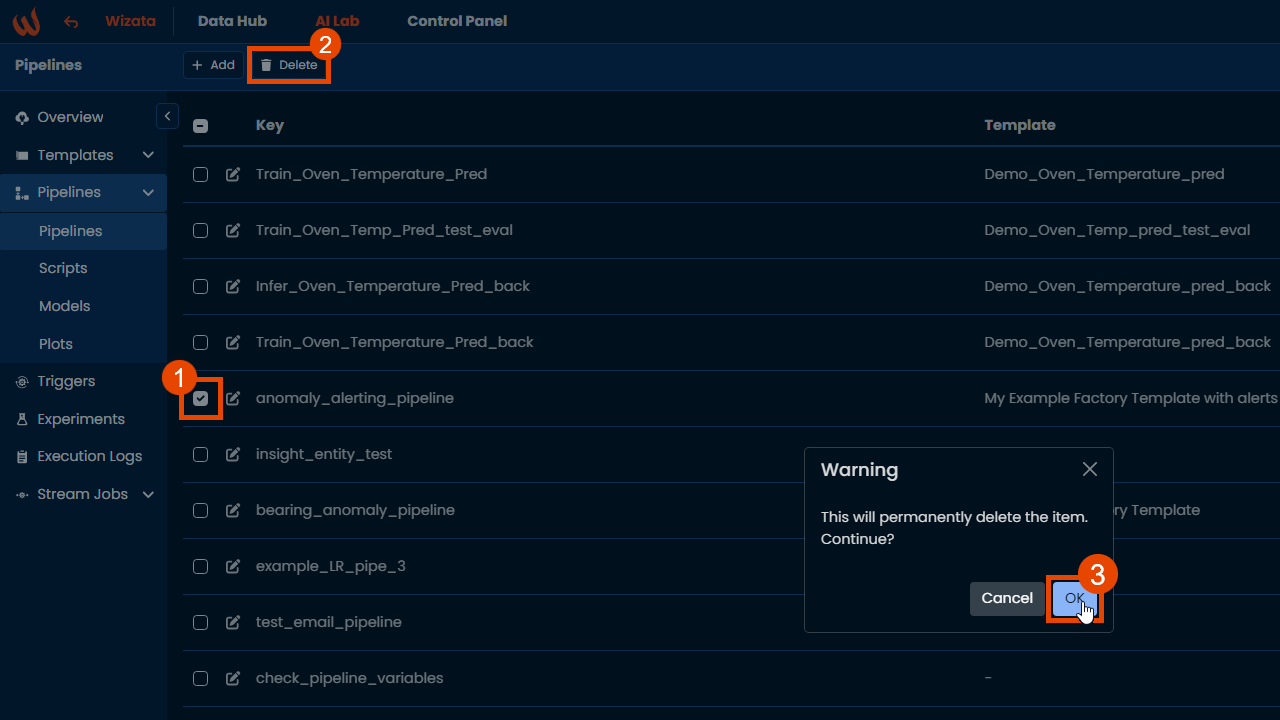
To delete a pipeline, use the .delete() method via the SDK, or select the pipeline from the list in the UI and use the delete option.
Updated 3 months ago
What’s Next
In the following articles, we will deeply review each pipeline step, starting with the Query step.