Trigger
A Trigger defines rules to execute pipelines automatically, ensuring that processes run efficiently without manual intervention. Triggers can be based on various conditions such as time intervals and delays, and support custom properties and twin assignments, providing flexibility and control over pipeline execution.
Creating a Trigger
Triggers can be created in two ways from the UI.
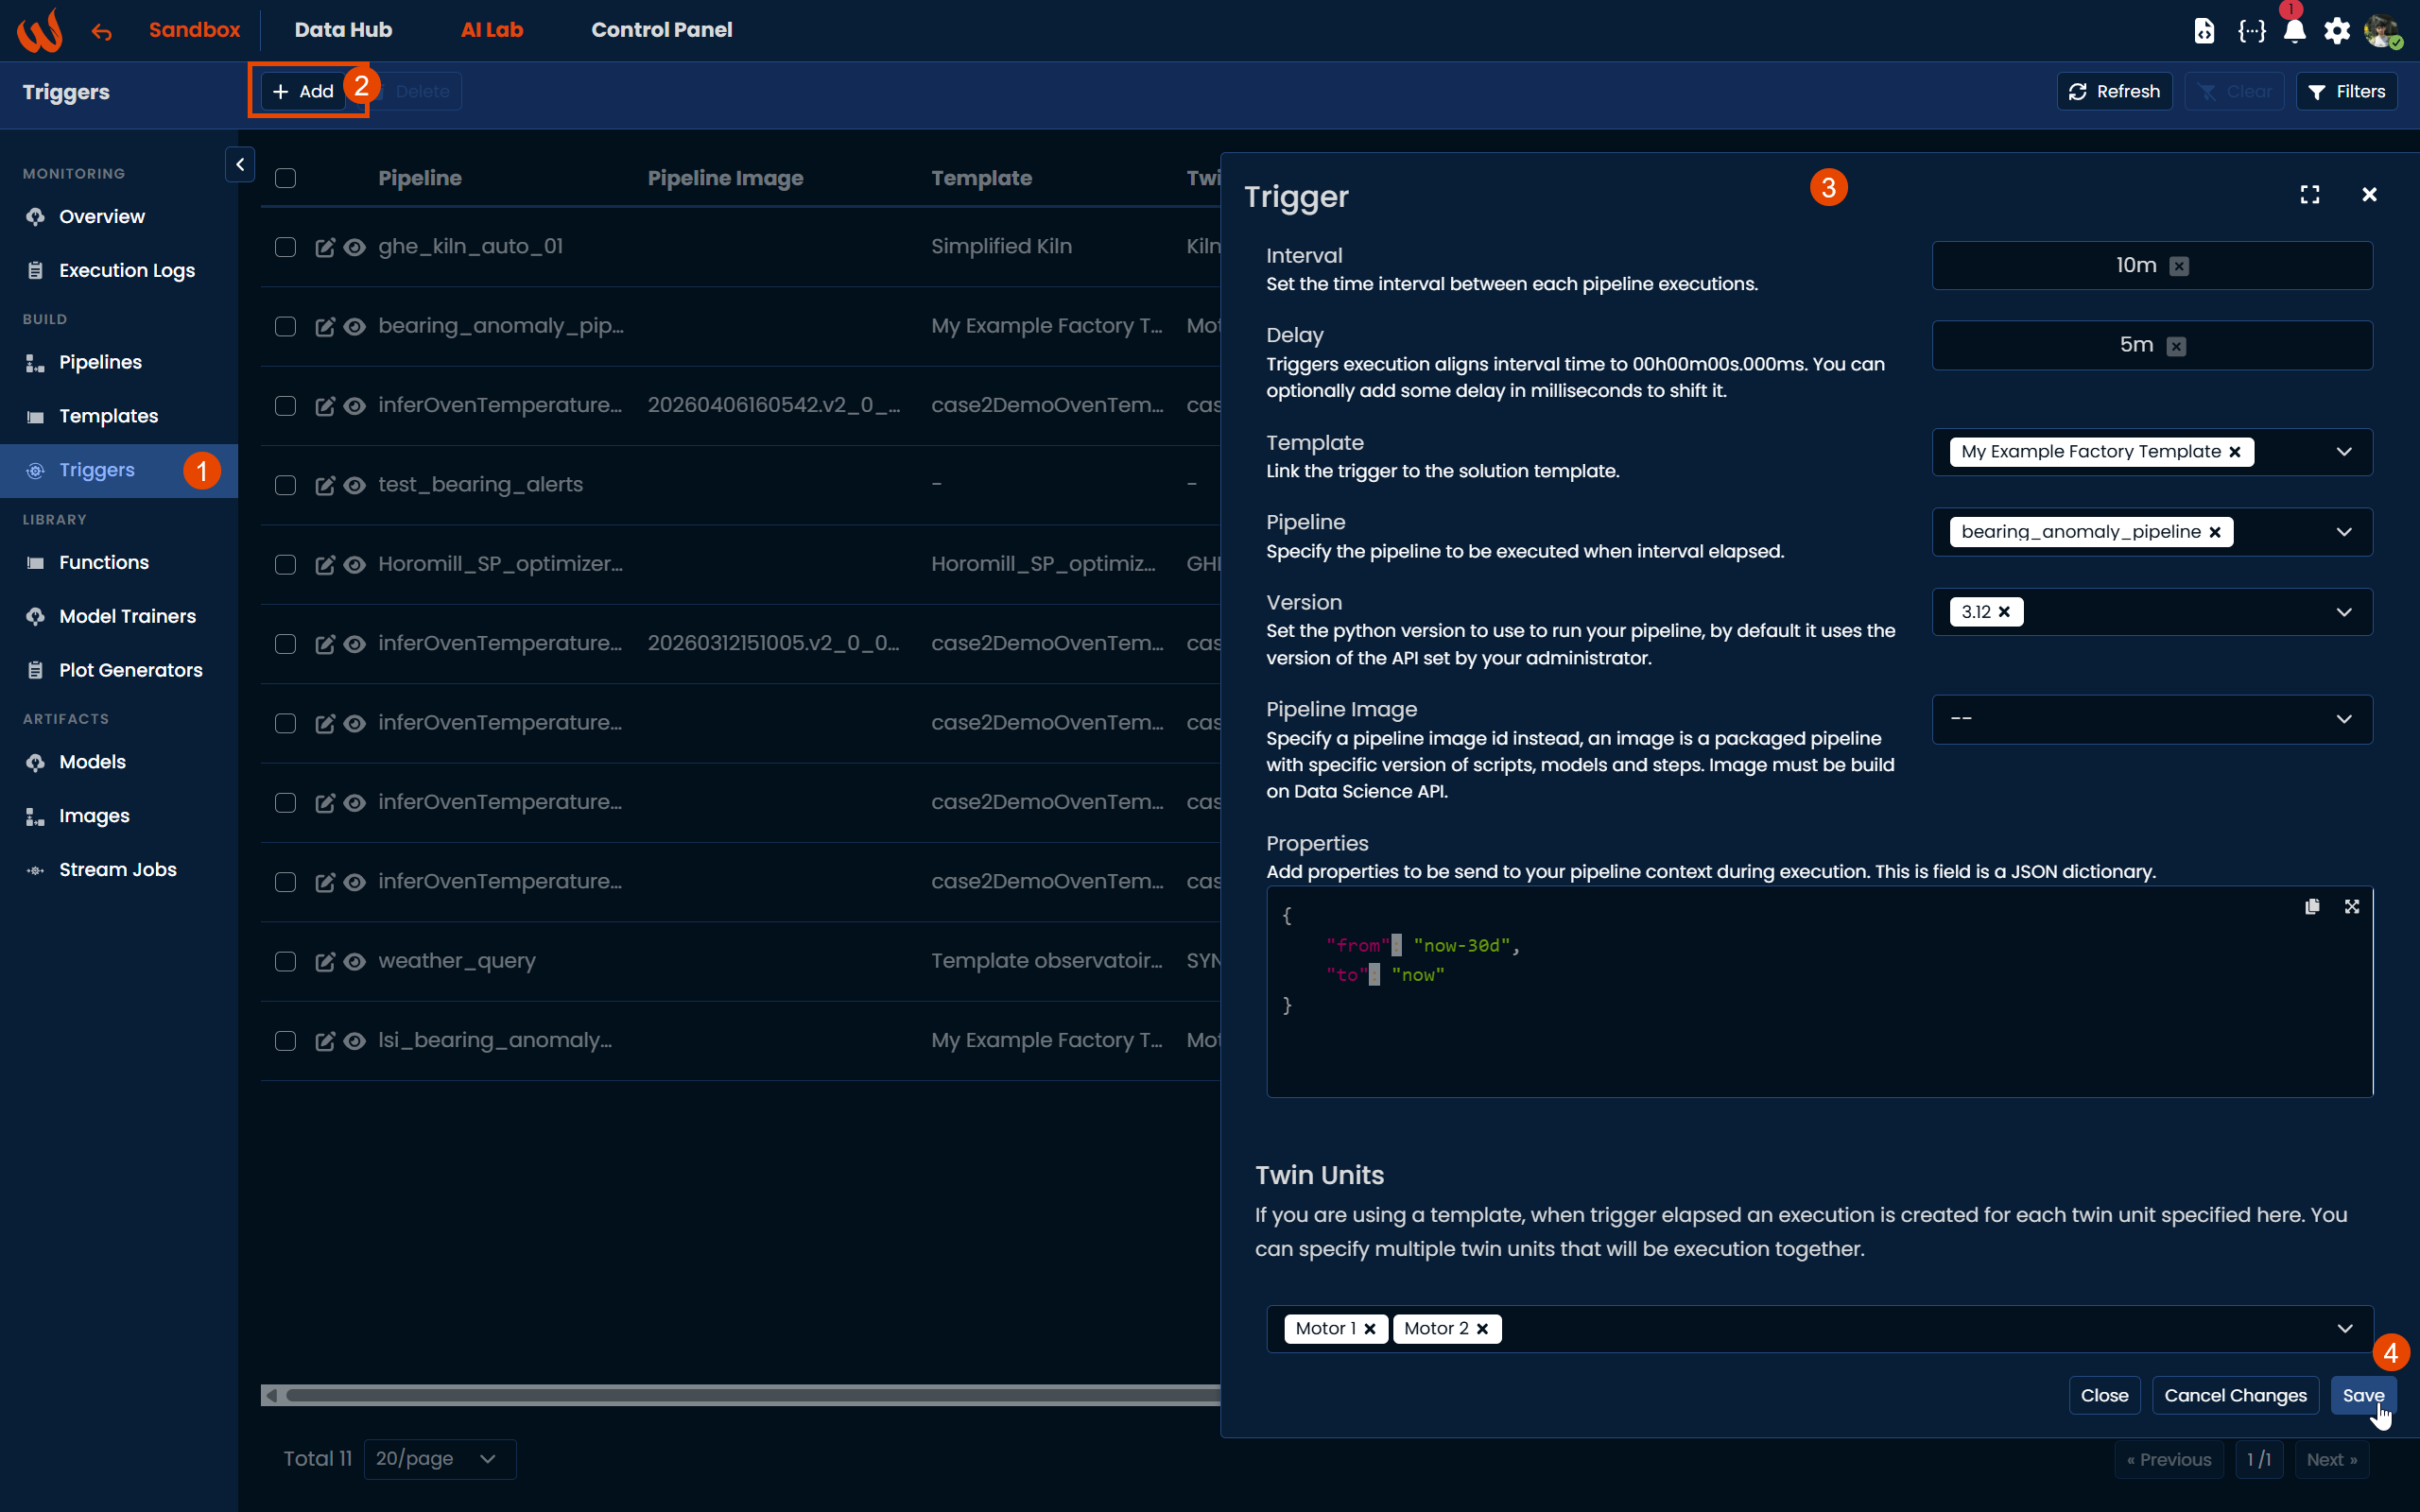
From AI Lab > Build > Triggers, click + Add to create a new trigger. This is the general view where you can manage all triggers across your pipelines.
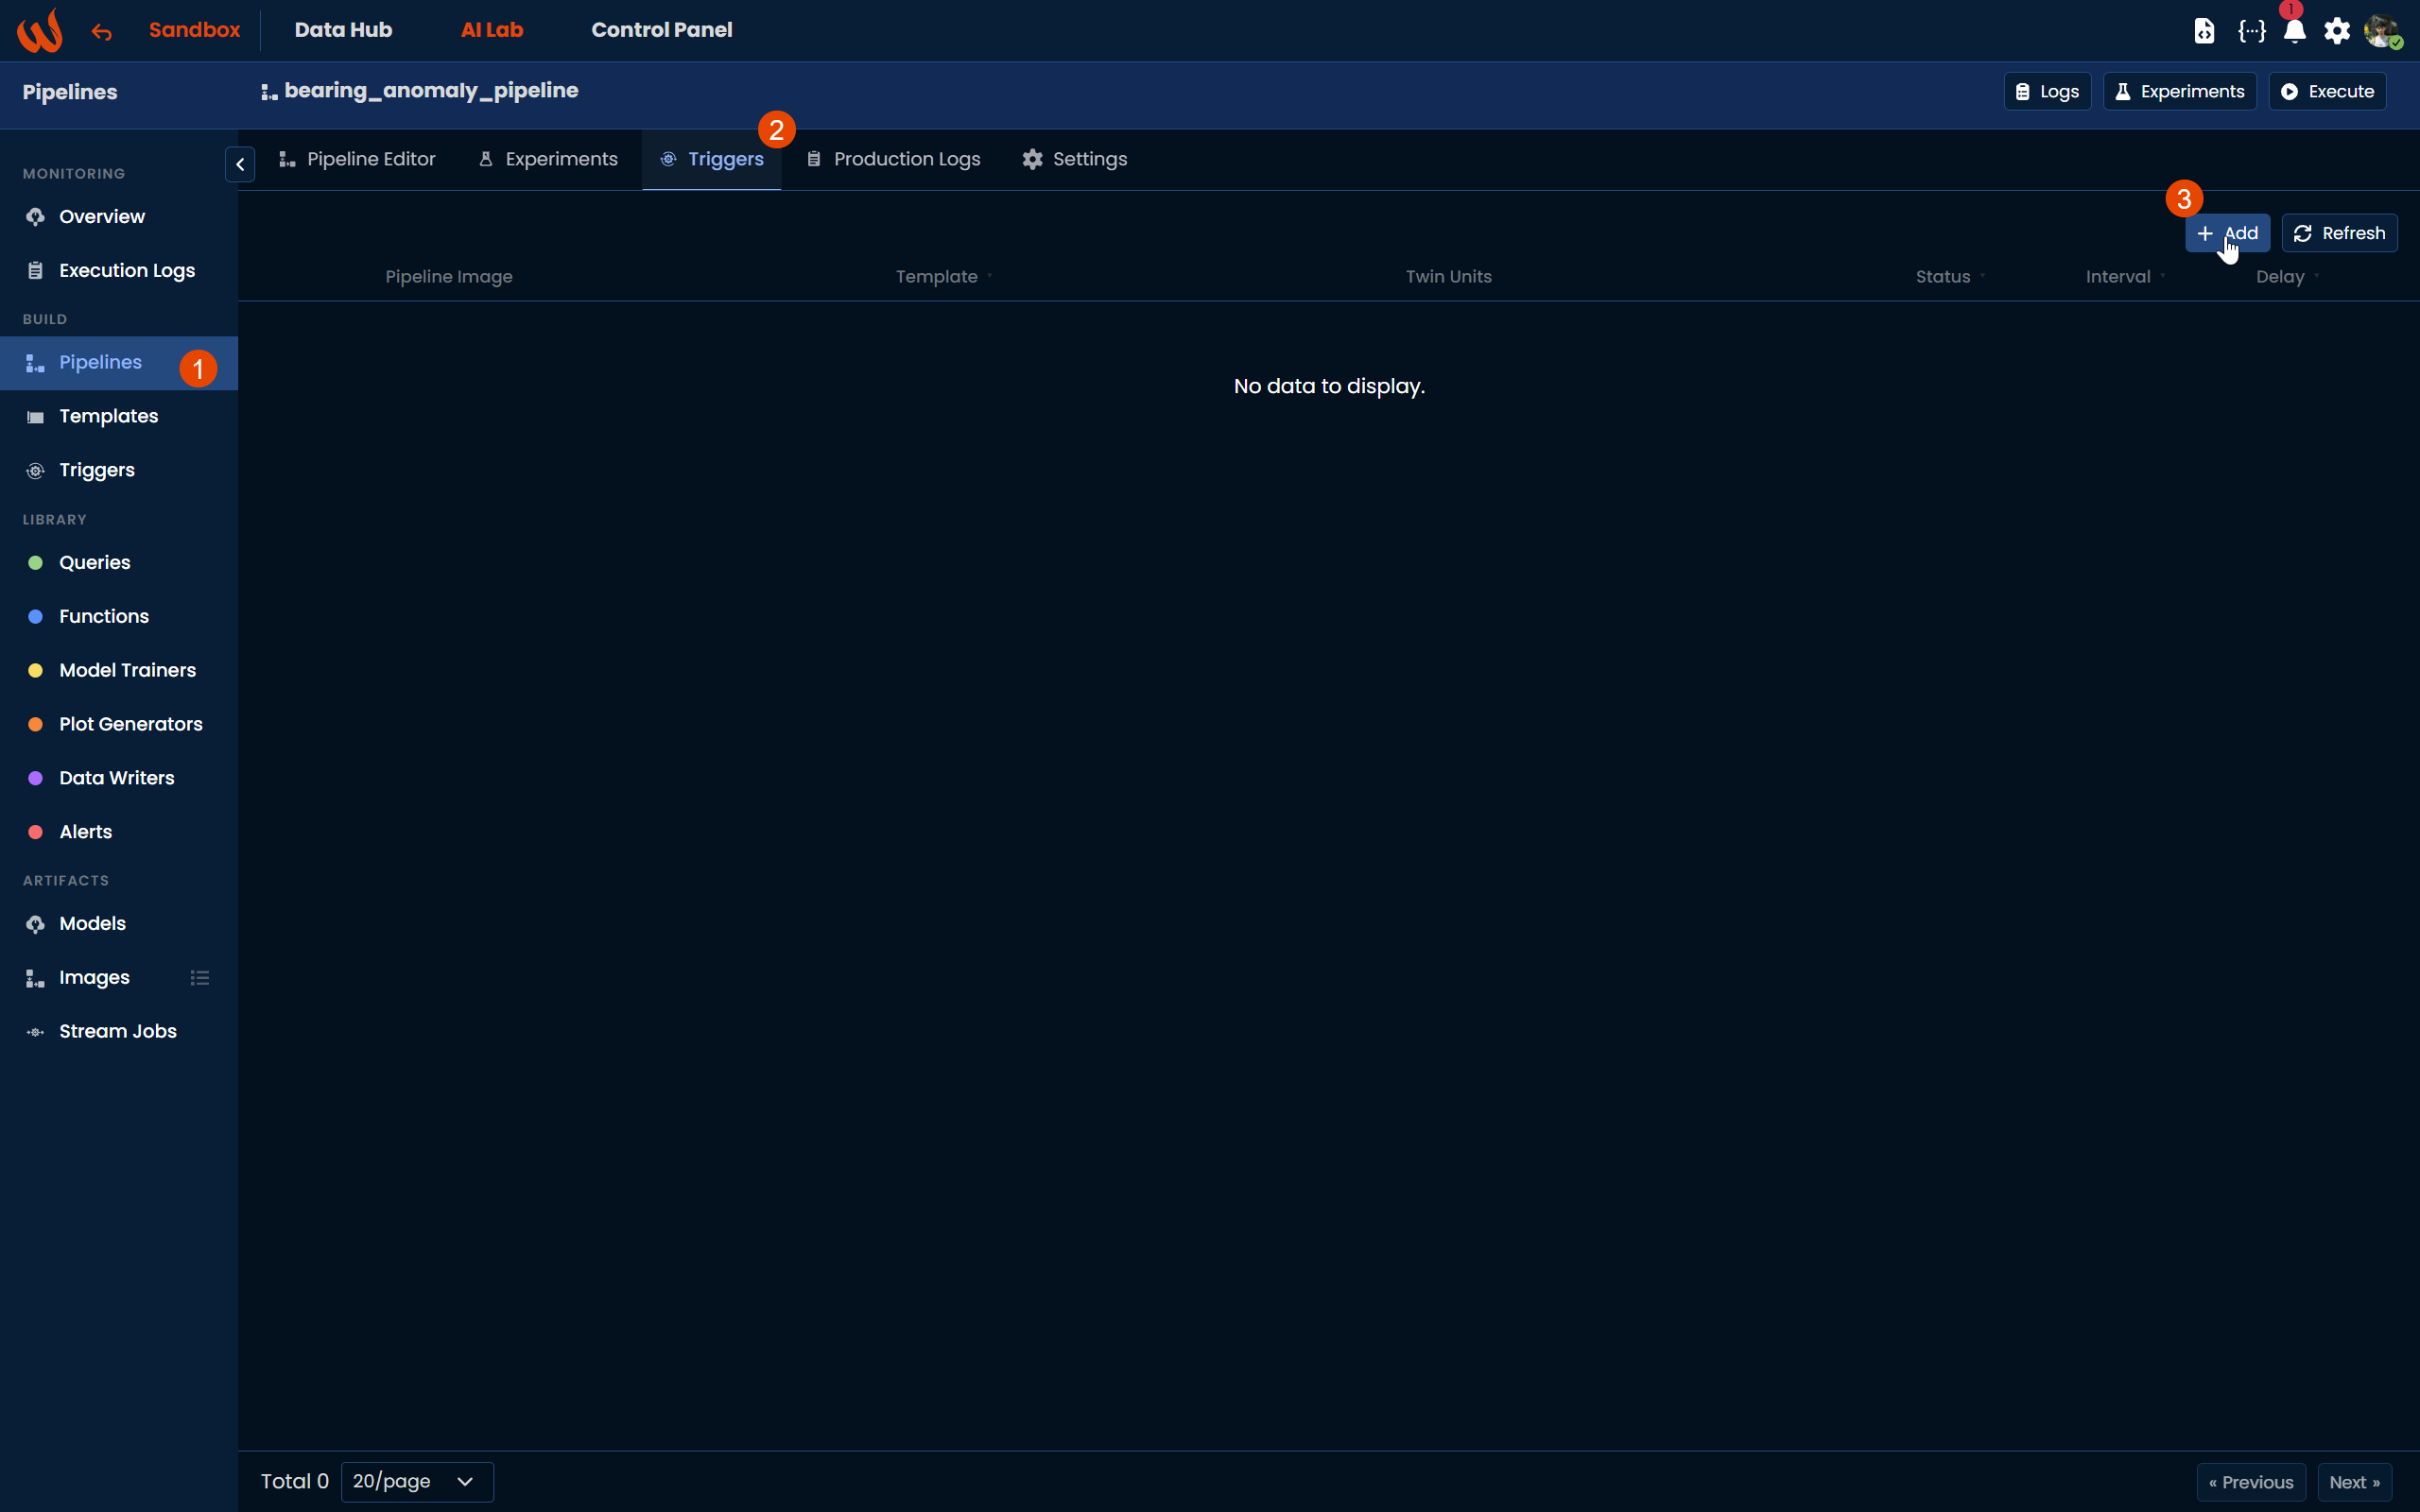
From the Pipeline Editor, open your pipeline and navigate to the Triggers tab. From there you can create a trigger specific to that pipeline or view all triggers already associated with it.
Using the Python Toolkit, create a trigger as follows:
trigger = wizata_dsapi.Trigger()
trigger.interval = 600000
trigger.delay = 300000
trigger.pipelineId = uuid.UUID("your-pipeline-id")
trigger.templateId = uuid.UUID("your-template-id")
trigger.properties = {
    "from": "now-30d",
    "to": "now"
}
trigger.twin_ids = [
    "your-twin-id1", "your-twin-id2"
]
wizata_dsapi.api().create(trigger)
Note that once triggers are set to execute a pipeline automatically, they cannot be modified using the API within that context.
Configuration Options
Interval and Delay
Triggers support scheduled executions at specific time intervals. Each interval is aligned to 0d 0h 0m 0s 0ms by default. An interval of 10 minutes will trigger at 0h10, 0h20, 0h30, and so on.
You can add a delay in milliseconds to offset the execution. For example, a delay of 300000 ms (5 minutes) combined with a 10-minute interval will trigger at 0h05, 0h15, 0h25, etc.
trigger.interval = 600000  # 10 minutes in milliseconds
trigger.delay = 300000     # 5 minutes in milliseconds
Timestamps are always perfectly aligned regardless of when the trigger is created or started. The queued date is used by default as the now timestamp for relative date expressions in query steps.
Template and Pipeline
Triggers must reference the pipeline to execute automatically. If your pipeline uses a template, you should also specify it on the trigger so it is applied to generated executions and eases the selection of twin units.
trigger.pipelineId = uuid.UUID("your-pipeline-id")
trigger.templateId = uuid.UUID("your-template-id")
Version
You can specify the Python version to use when the trigger executes the pipeline. If not specified, the platform default will be applied.
Pipeline Image
Optionally, you can reference a pipeline image to use a packaged version of the pipeline instead of the live definition. This is required when executing on the Edge. Refer to the Pipeline Images article for more details.
Properties
You can define fixed properties to pass to each pipeline execution through the trigger. These follow the same @var_name notation used in experiments.
trigger.properties = {
    "from": "now-30d",
    "to": "now"
}
This JSON dictionary can also be filled in directly from the trigger creation form in the UI.
Twin Units
When using a templated pipeline, you can specify which registered twins the trigger should execute against. At each interval, the triggering service will create one execution per twin.
trigger.twin_ids = [
    "your-twin-id1", "your-twin-id2"
]
Now: Queued vs Started
Within the pipeline Context , now defines the reference datetime used for relative expressions such as now-10m in query steps. You can control which datetime the pipeline uses by setting a now property on the trigger:
queued(default): the pipeline uses the moment it was pushed to the queue asnow. This is recommended when timestamp consistency is required, such as ensuring sharp timestamps aligned to the interval and delay configuration.started: the pipeline uses the moment it actually began executing on the pipeline engine, regardless of when it was queued.
If your pipeline is writing data back to the platform, it will use the timestamps resulting from the query by default, not the
nowvalue.
Complete Example
Here is a complete example of a trigger creation using the Python Toolkit:
trigger = wizata_dsapi.Trigger()
trigger.interval = 600000
trigger.delay = 300000
trigger.pipelineId = uuid.UUID("12bf7b2f-e791-4d98-86c6-19ada0274012")
trigger.templateId = uuid.UUID("1da299e3-8bfe-4688-9779-bd43ea28060b")
trigger.properties = {
    "from": "now-30d",
    "to": "now"
}
trigger.twin_ids = [
    "48d07d92-df8c-49fb-9df7-ca6621f35c8c",
    "cf3dd6b7-cce2-4b8b-b1bd-169552362dfa"
]
wizata_dsapi.api().create(trigger)
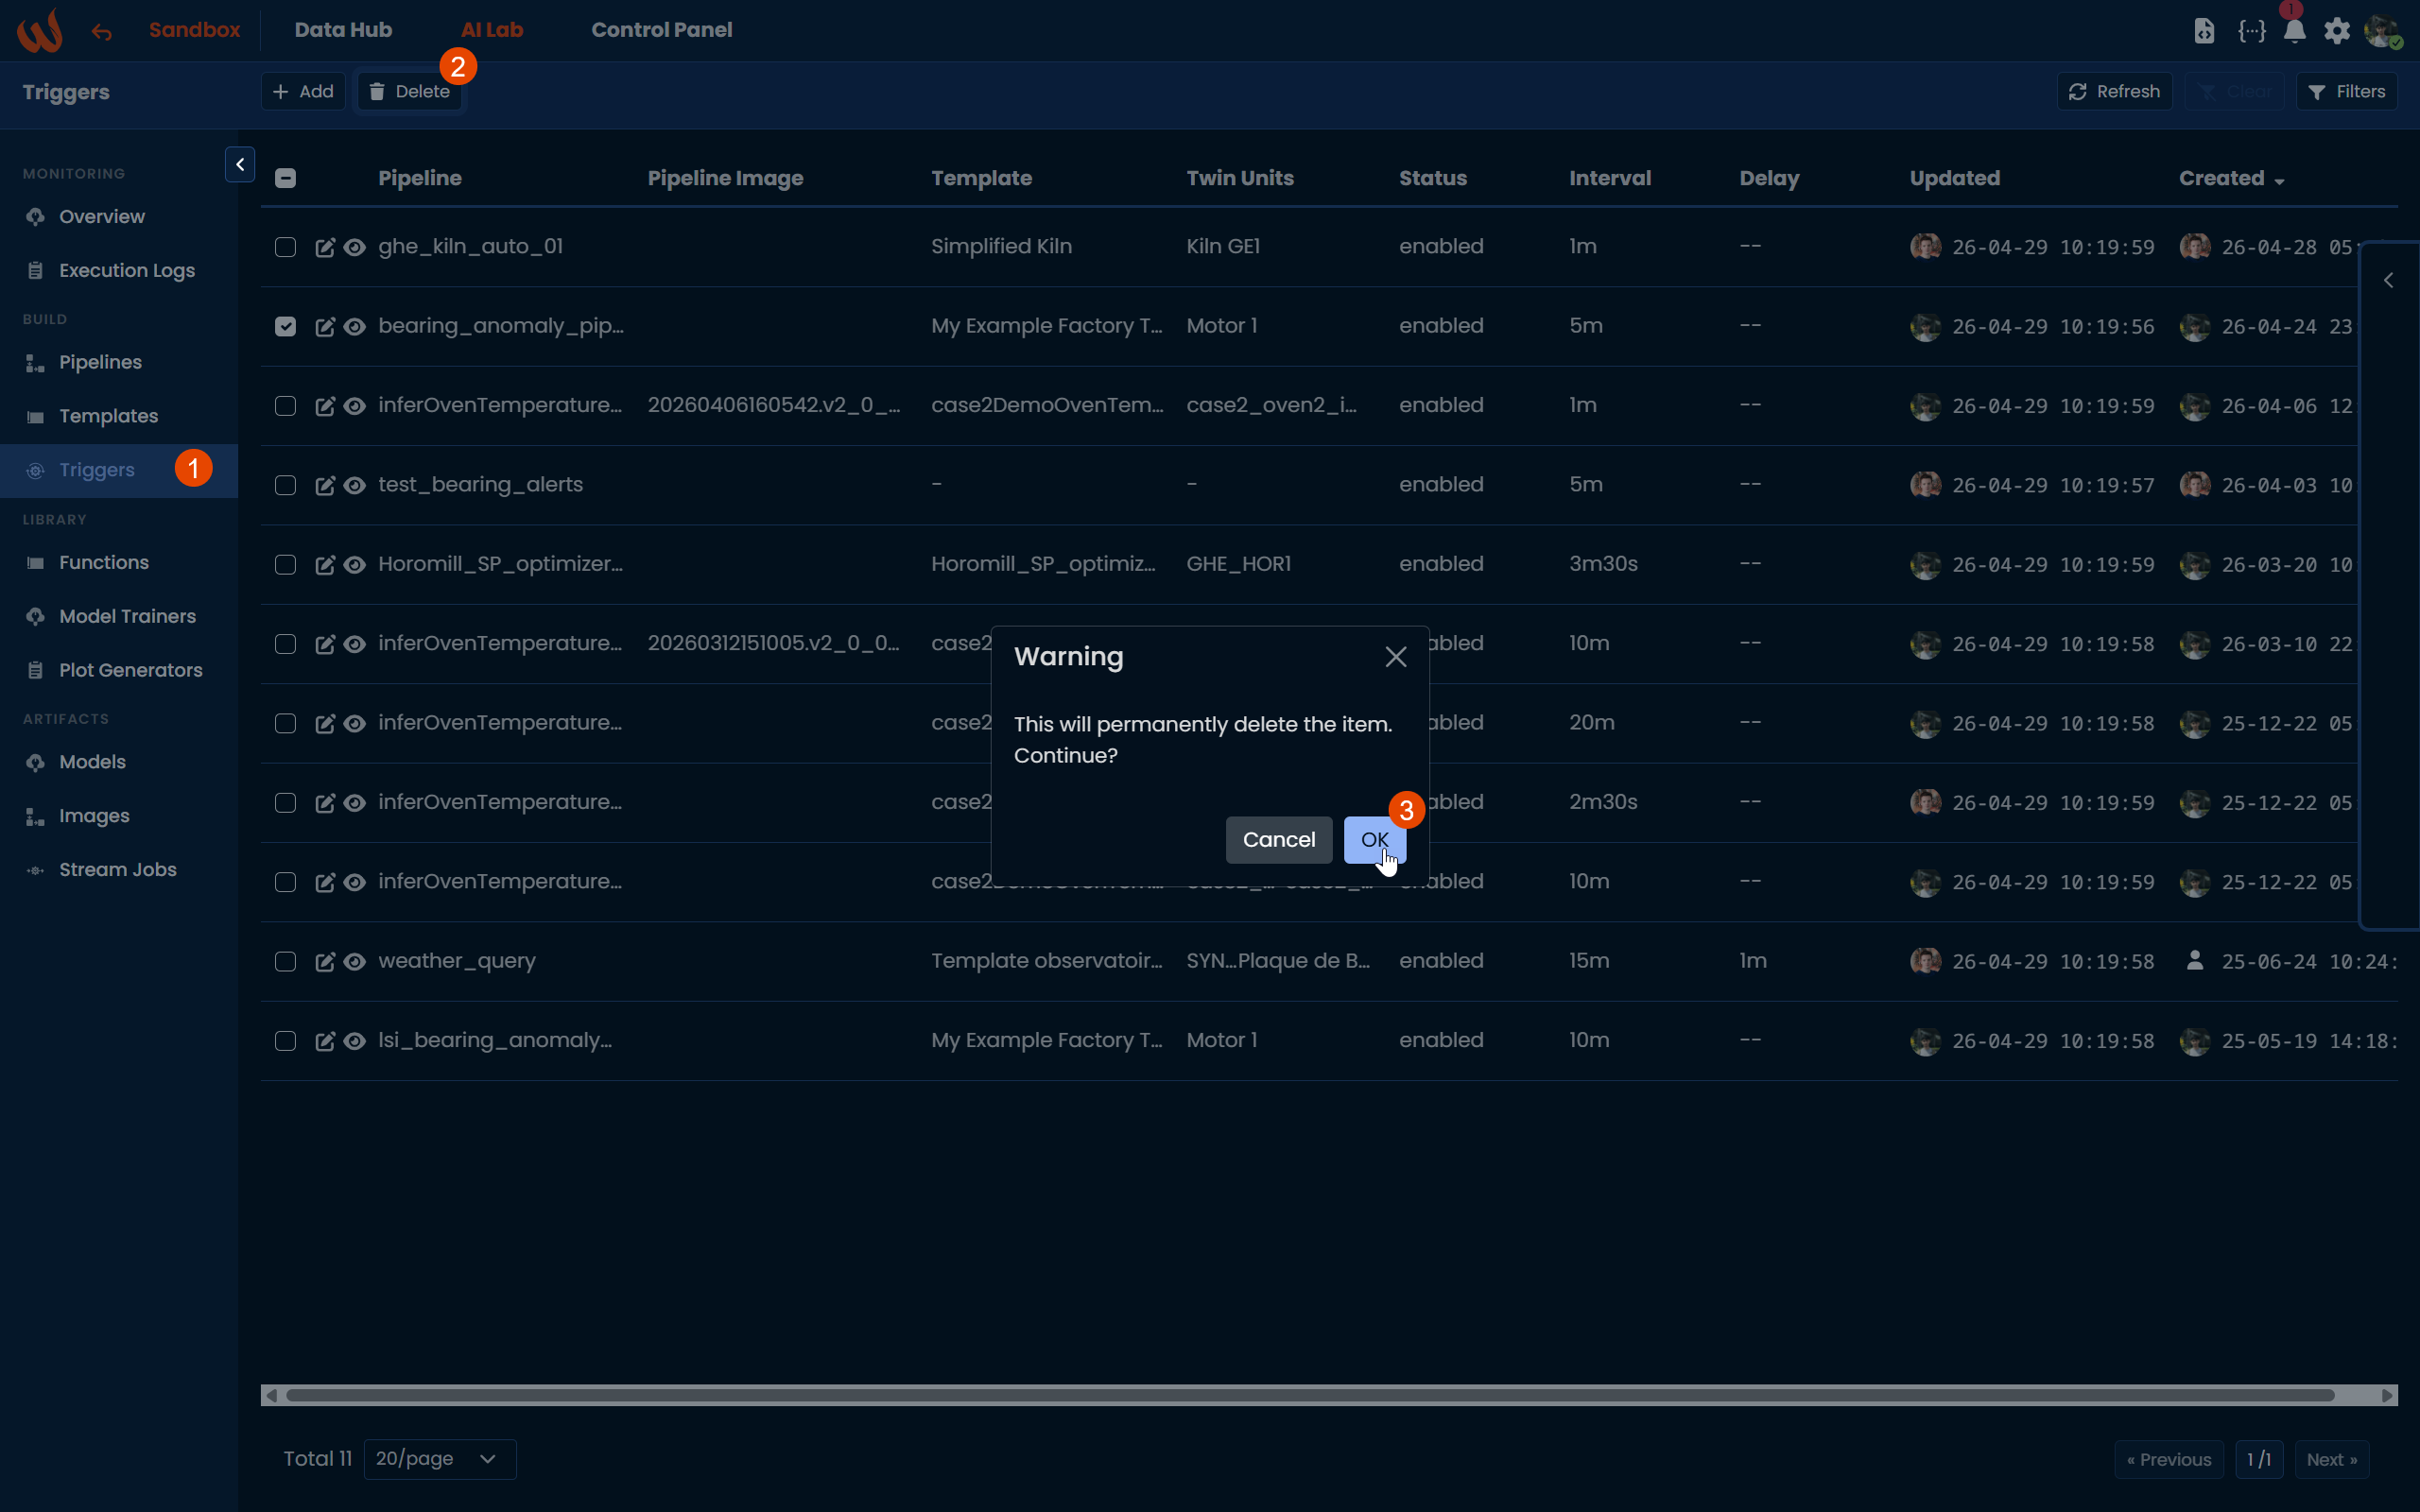
Deleting a Trigger
To delete a trigger from the UI, navigate to AI Lab > Build > Triggers, select the trigger you want to remove and use the delete option.
To delete a trigger using Python, use the .delete() method by passing the trigger object:
trigger_object = wizata_dsapi.api().get(id="your-trigger-id", entity=wizata_dsapi.Trigger)
wizata_dsapi.api().delete(trigger_object)
If the pipeline has been executed at least once by the triggering system, you can retrieve the trigger IDs from the execution logs using .search_executions(). The following script retrieves and deletes all triggers found across the first 50 execution records:
pipeline_id = wizata_dsapi.api().get(pipeline_key="my_pipeline").pipeline_id

execution_list = wizata_dsapi.api().search_executions(pipeline_id=pipeline_id, page=1, size=50)

for execution in execution_list.results:
    if execution.trigger_id:
        trigger_object = wizata_dsapi.api().get(id=execution.trigger_id, entity=wizata_dsapi.Trigger)
        wizata_dsapi.api().delete(trigger_object)
Since
.search_executions()returns a PagedQueryResult , you may need to iterate through multiple pages to retrieve all results. For better efficiency with a high volume of logs, filter the query to reduce the total number of results.
Updated 2 months ago