Updating your datapoint metadata
The Wizata platform provides extensive customization options for editing your datapoints. In this article, we will dig into the various aspects of datapoint customization, exploring the variables you can modify and the advantages of adjusting these settings to better suit your operational needs.
Once you upload your datapoints to the platform, they will initially appear with the tag name from the IoT system configuration, but without any additional properties attached. Wizata offers various options for editing datapoints, allowing you to customize them according to the specific goals you wish to achieve.
Different datapoint properties
Before entering into details of how to update datapoint properties, we will briefly explain each customizable option available on the platform adding examples from the sample data file provided on the Connect article:
Property | Python variable | Description | Example based on sample data provided |
|---|---|---|---|
Hardware Id |
| Mandatory and unique. It is the identifier of your datapoint. Must beidentical to your tag name from IoT system. Maximum length is 128 characters, and should not contain special characters excepting standard separators (".", "_", "-"). | mt_bearing1 |
Name |
| Display name for users. | motor_bearing1 |
Description |
| Additional information for users shown as a tooltip. | Time-series data of the vibration from the motor bearing. |
Business type |
| • | In our case, we will use the default value which is |
Category |
| Unit group technical ID. (Use | Vibration |
Unit |
| Unit ID (Use |
|
Twin |
| Twin technical ID (not hardware ID ) on which datapoint is linked. | Motor 1 |
Input mode |
| Type of input mode: • • • • | In our case, we will use the default value |
Minimum value |
|
| 0 |
Maximum value |
|
| 0.1 |
Frequency |
| Frequency of data expected in milliseconds. | 15000 (15 seconds) |
Extra properties |
| JSON serializable dictionary of extra properties. |
Wizata platform provides more properties for customization like the possibility to add an icon, a color for the icon, the location coordinates or the label of a particular datapoint. This options can ONLY be added as a manual option on the platform UI.
We also have a technical documentation for the Datapoint object in our Python SDK documentation
Updating specific datapoint
Now that you’re familiar with the properties you can edit on your datapoints, let's explore how to add and update them on the platform. While both the Wizata Python Toolkit and the UI allow you to modify these properties, each method has its own advantages depending on your specific needs.
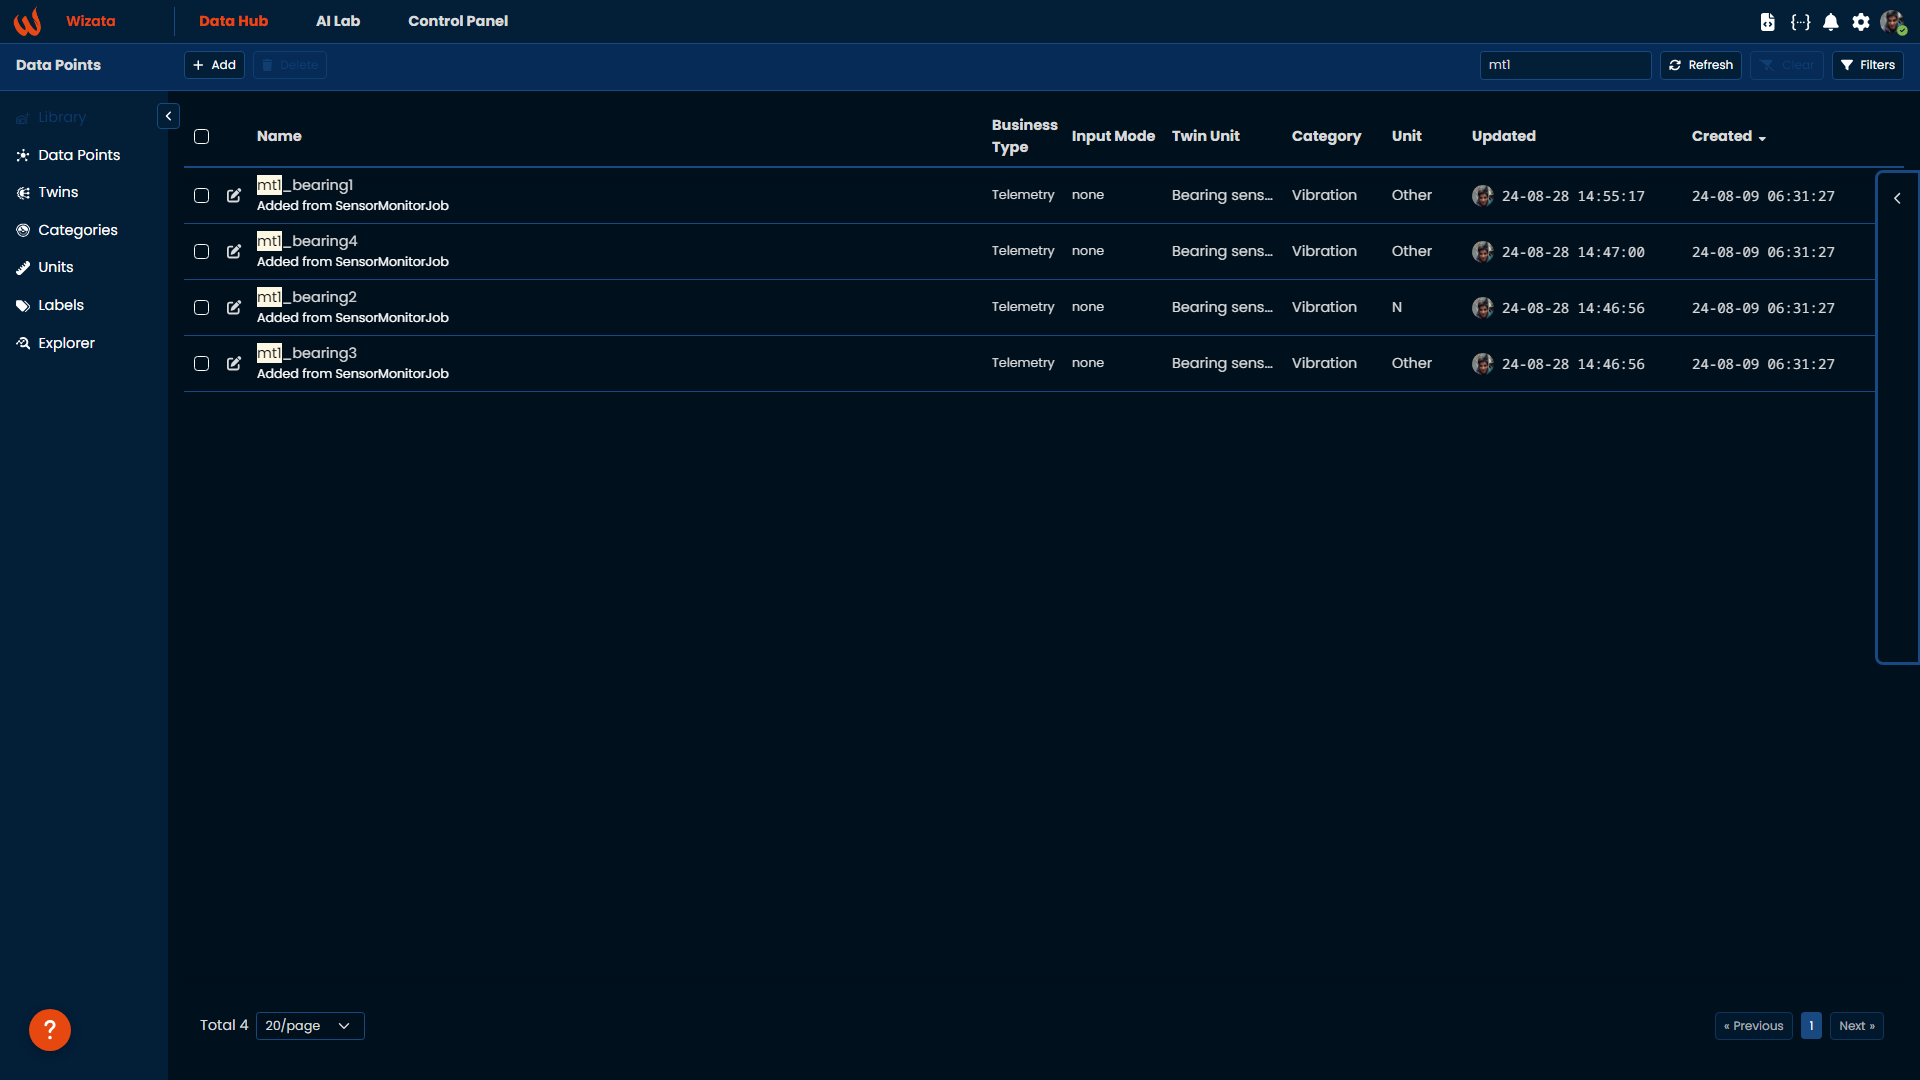
To start, let’s go over the basics: updating a single datapoint using the user interface. Begin by navigating to the Data Hub menu, selecting Data Points, and then clicking the table view icon. This will open a table displaying all the datapoints currently in your platform.

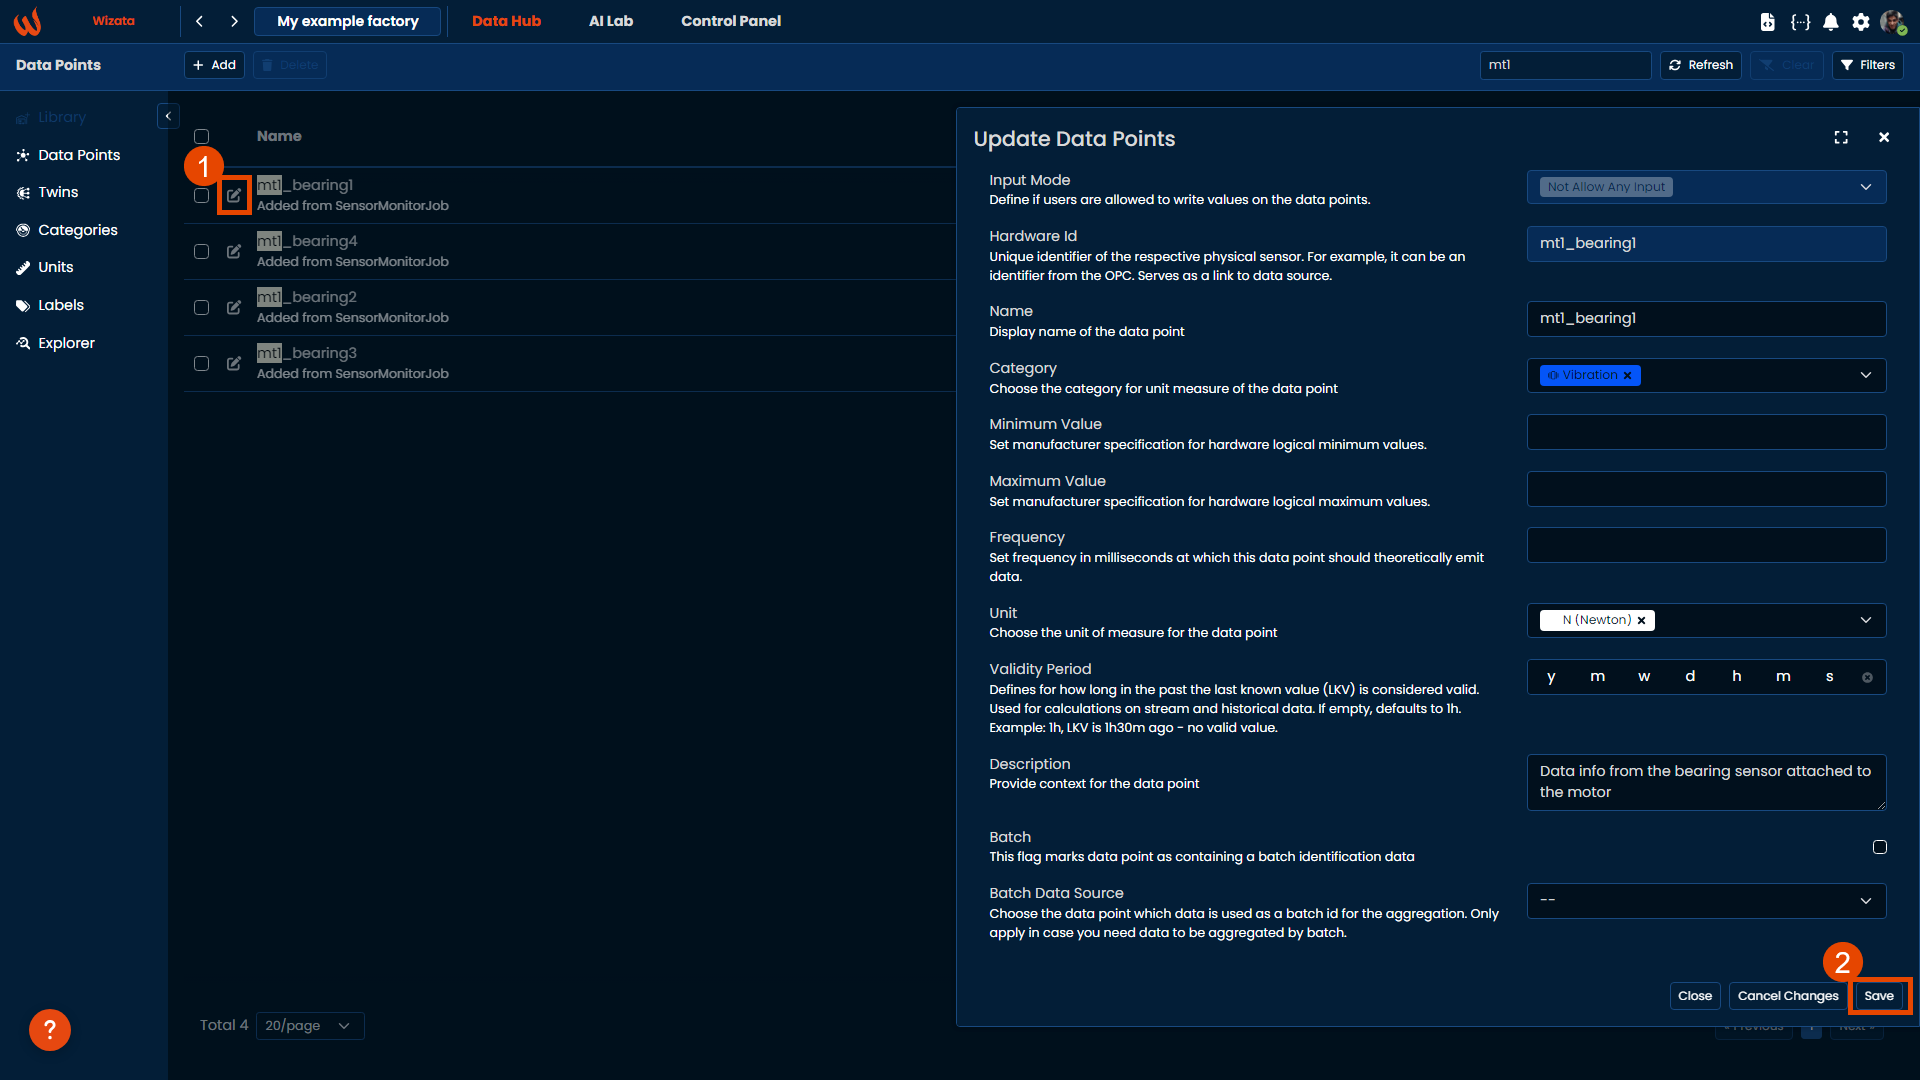
Once we located the datapoint we want to edit, we will click on the pencil icon to open the right-side panel with all the available options. Among these, you’ll find more specific settings, such as adding precise location coordinates or defining the validity period, which determines how long the last known value (LKV) remains valid.
In our case we will edit the measure unit, the category and the description fields. After updating all the desired fields, click Save to confirm the changes:

Updating datapoints with source information
Now let's imagine the case where we have sent our time-series data from our equipment to our platform but we have specific information of them in a separated file, like the unit or the category to where they all belong. In cases where we need to automatically modify certain properties for a group of datapoints, the Wizata DS API comes in handy.
It is advisable to classify datapoints through the category and the unit measure. Currently the Platform offers a broad range of categories and units. Nevertheless, we understand that there might be cases where you want to customize the list available and add new items.
In this case, we have an article where we talk about these properties in details.
In the following example from the sample data file provided, we will show how to fetch datapoints from our motor 1 bearings, update the category property and save them.
Obtaining the list of datapoint objects to be edited
To obtain a list of our data points objects inside the platform, we can use the search_datapoints() method, which returns a PagedQueryResult.
Please remember that when passing the
hardware_idyou can filter on a specific hardware ID name or partial name
category_id = None

categories = wizata_dsapi.api().get_categories()

if 'Vibration' in categories:
    category_id = categories['Vibration']
else:
    category = wizata_dsapi.Category(name='Vibration')
    wizata_dsapi.api().create(category)


datapoint_partial_name = 'mt1_'
i = 1 # Page number
page_size = 20 # Number of datapoints per page
total = None
has_more = True

while has_more:
    datapoints = wizata_dsapi.api().search_datapoints(hardware_id=datapoint_partial_name, page=i, size=page_size)
    if i == 1:
        total = datapoints.total

    for datapoint in datapoints.results:
        datapoint.category_id = category_id
        wizata_dsapi.api().upsert_datapoint(datapoint)

# Exit condition if no more datapoints to update
    total -= page_size
    i += 1
    if total < 0:
        has_more = False
We can adapt the script to meet specific requirements, building a condition if certain property is not in the platform to create it automatically and attach it to our datapoint list, for example. The upsert_datapoint() method, as described in the SDK documentation, will either update the existing datapoint with the new properties attached or create the datapoint if it doesn’t already exist.
When updating your datapoint metadata, the
upsert_datapoint()method ensures that no property is lost during the process.
We can also delete a data point using the DSAPI, passing the Datapoint object inside delete() method.
deleted_dp = wizata_dsapi.api().get(datapoint_hardware_id = 'mt1_bearing1')

wizata_dsapi.api().delete(deleted_dp)
Updated 3 months ago