Creating a Streamlit solution

Thanks to the Control Panel's integration with Streamlit, you can embed deployed applications directly into the platform as components, enabling users to display and interact with content seamlessly within Wizata. In this article, we will guide you through the process of connecting your Streamlit solutions to your environment, along with an example to help you build your first Streamlit solution on the platform.
For additional information regarding Streamlit, you can refer to their official documentation page.
To interact with your app in Wizata, ensure that your Streamlit solution is already deployed on a domain.
Streamlit solution samples: Batch tracker
For this tutorial, we have created a Python script solution that simulates a batch tracker search tool. This tool retrieves all the available data from the bearings for a specific batch ID and also for a specific timestamp. We will walk you through installing the sample, meeting the prerequisites, and hosting the app locally.
Prerequisites
You can found this tutorial sample code on our GitHub as sample-05You will also need to have previously uploaded the sample dataset from motor bearings and the batch event tracker.
Make sure to reviewthese articles before proceeding, or skip ahead to Creating Streamlit component if you already have a Streamlit solution deployed.
Installing the samples
Once you have downloaded the resources from our GitHub, set them up in your Python development environment. Run the command pip install -r requirements.txt to install all the necessary dependencies.
The repository includes a search_bearings_by_timestamp.py and a search_bearings_by_id.py files with the necessary logic code to perform a batch tracker search simulator.
You will need to deploy the solution in your dedicated environment. DS API will be auto-configured on it.
Creating Streamlit components
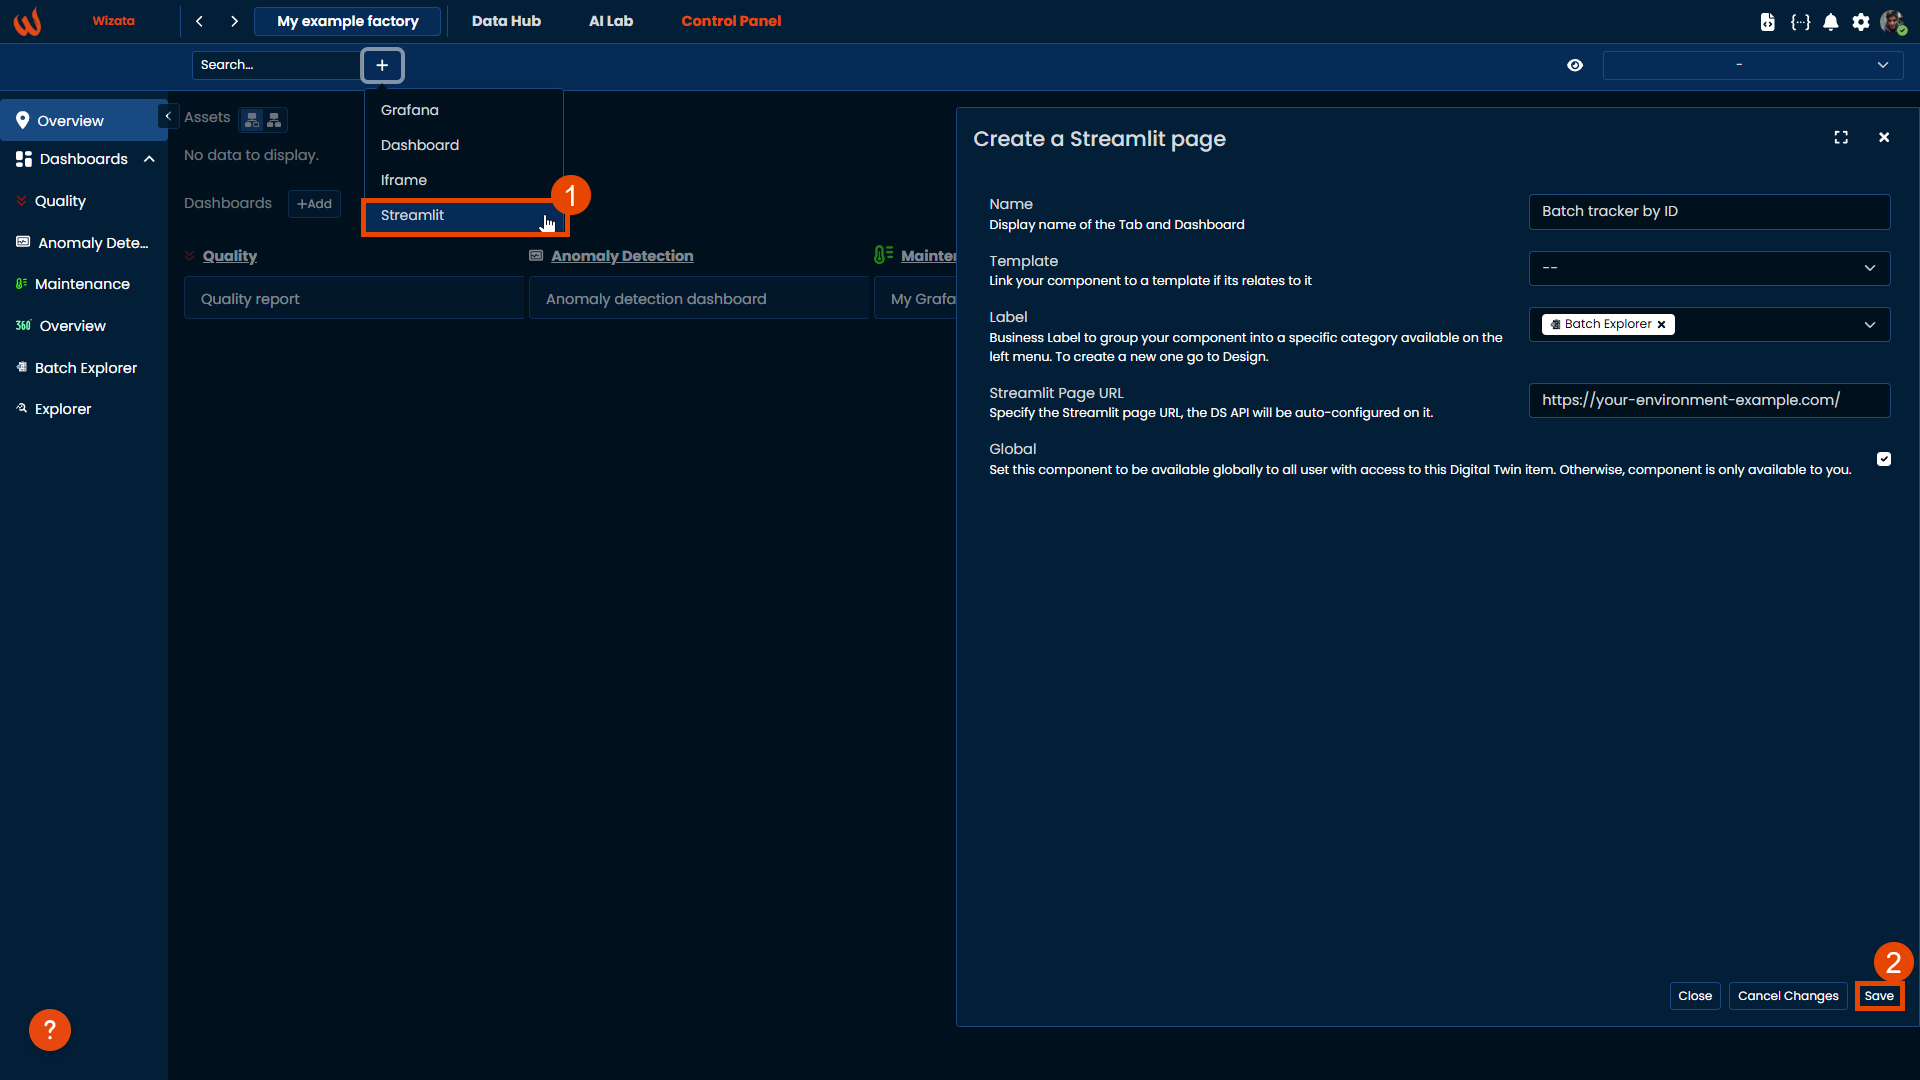
After deploying your Streamlit solution on an environment, you’ll need the Streamlit Page URL to embed it into the platform as a Component. To do this, navigate to Control Panel and click on the + button to create your Streamlit Component page.

Once saved, the new component will appear in the platform, ready to use with DS API automatically configured.
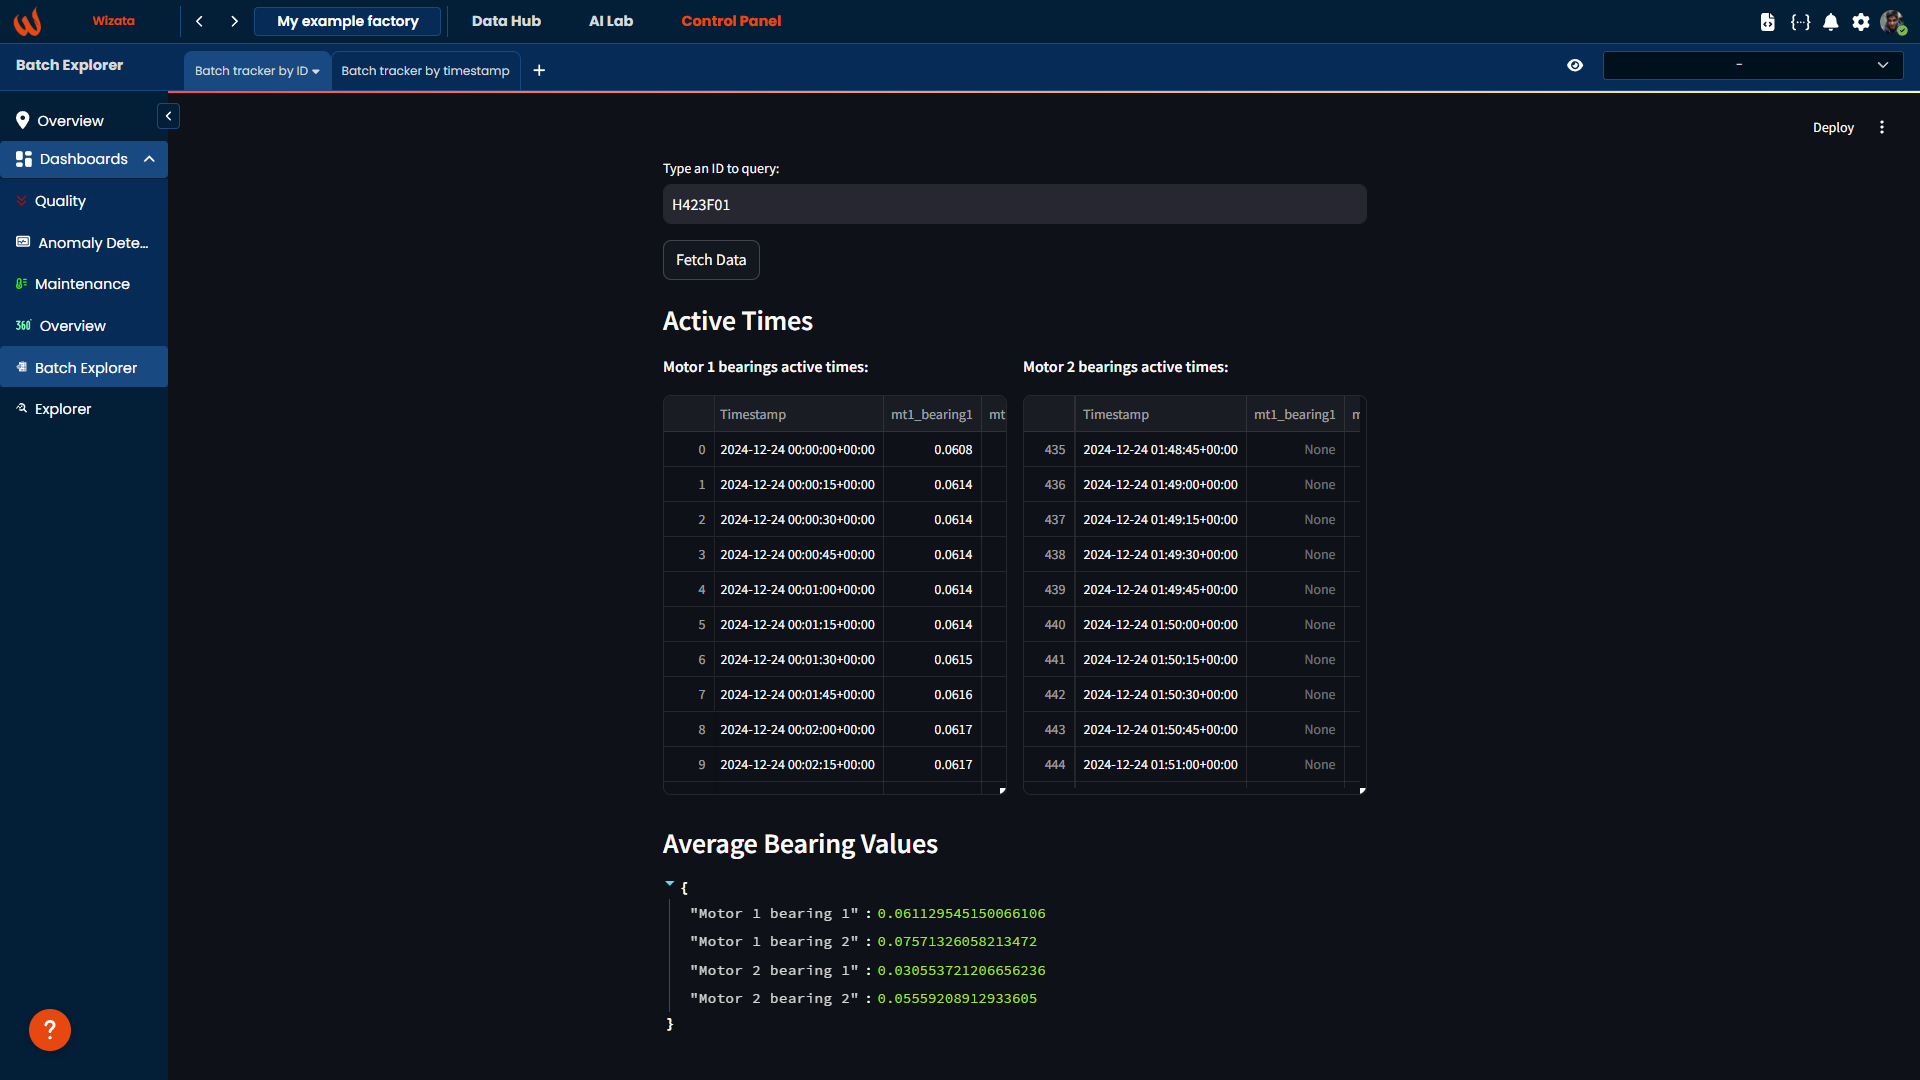
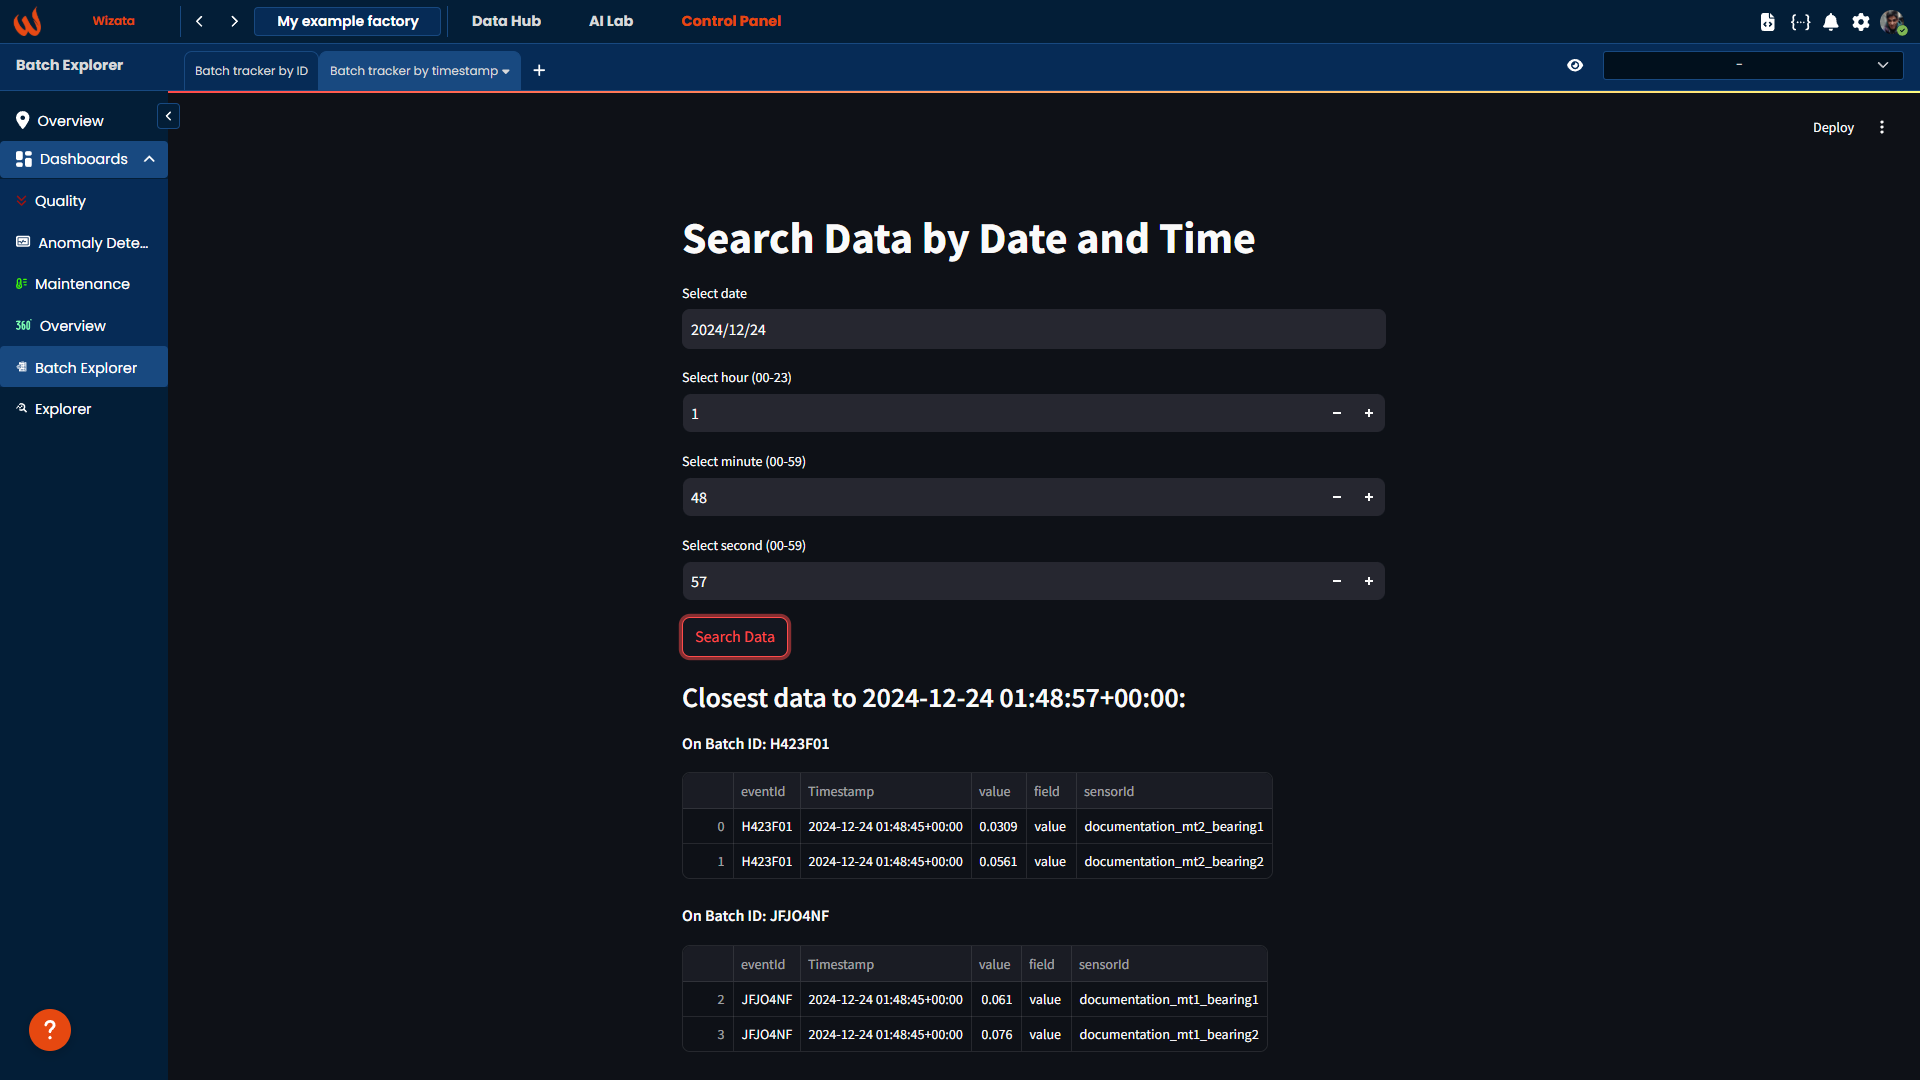
In this case, we created two different components for a batch tracker, one for specific ID and another for specific timestamp. You will see them in different tabs inside the Batch Explorer business label .
For instance, we can use batch tracker by ID to search for an ID H423F01. The results will display all the available values for the bearings of each motor, along with the average values for each bearing within that specific batch.

Or using the batch tracker by timestamp, by passing an specific datetime to search for the available batches that were being processed at that time:

You can adapt the Streamlit application to suit your specific needs, whether querying batch-specific data or building interactive solutions to enhance your workflows and analyses.
Updated 4 months ago