Components
Types of components
Components offers an extensive solution for users to interact with AI solutions : production efficiency, quality control, downtime analysis, and more..
The Control Panel seamlessly integrates with other manufacturing systems and databases, ensuring that all relevant data is consolidated into a single platform. The platform offers different types of component solutions to monitor and visualize AI solutions:
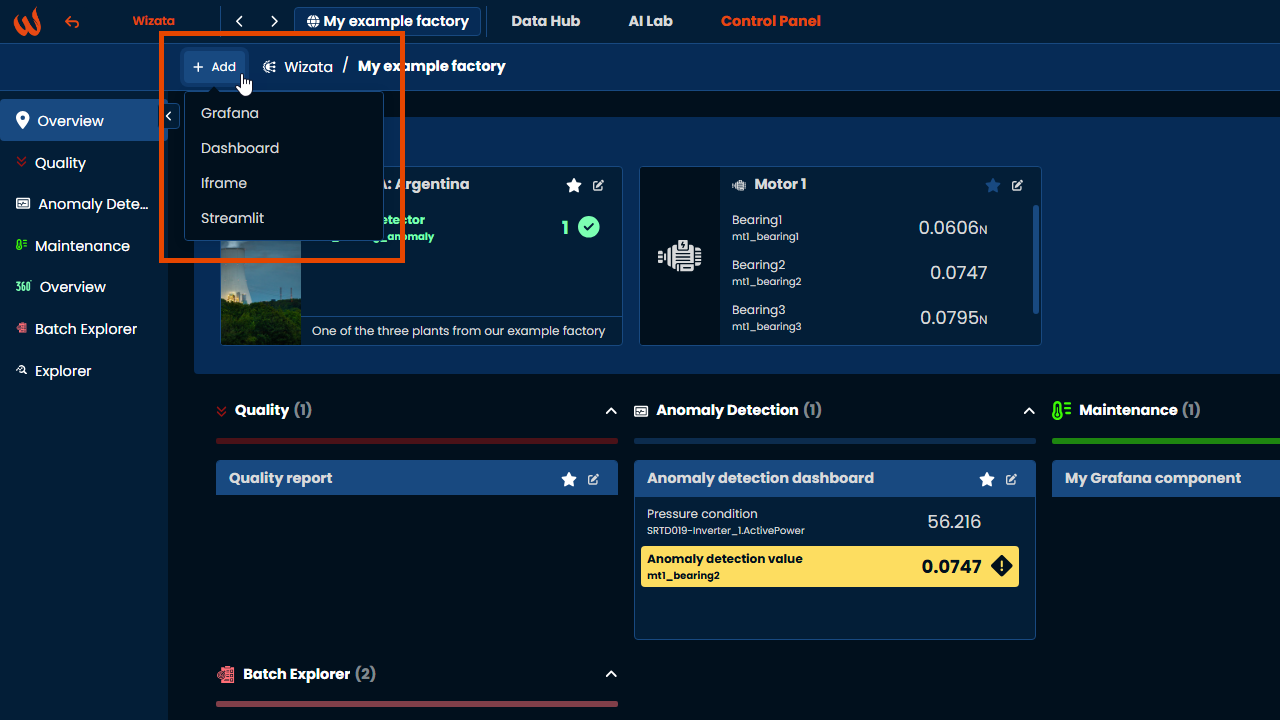
- Dashboard: A native, built-in and easy-to-use, dashboarding tool.
- Grafana: Using Grafana dashboard instead of our native one as an alternative. A Grafana instance must be integrated in prior to be able to use it.
- Iframe: Integrate any content or app as long as an Iframe link can be obtained, such as external data tools, reporting apps (PowerBI, Tableau, etc.), images feed, and much more.
- Streamlit: You can embed deployed Streamlit Python solutions as components. This is a good solution for data scientists and AI/ML engineers to deliver interactive data apps and integrate them inside the platform.
Creating a component
To create any of the components mentioned above, navigate to the Control Panel page and click the + Add button in the top-left corner. This will open a settings panel based on the type of component you want to create.
Get a specific component using get_components()
get_components()The .get_components() method retrieves a list of components from the platform. You can apply filters by label, template, twin , limit results to organization-only components, or search by a partial name.
dashboards = wizata_dsapi.api().get_components(
    label_id=ad_business_label_id,
    twin_id=twin_id,
    name="Anomaly",
    template_id=template_id,
    organization_only=False
)
For a full list of parameters, refer to the SDK documentation: WizataDSAPIClient
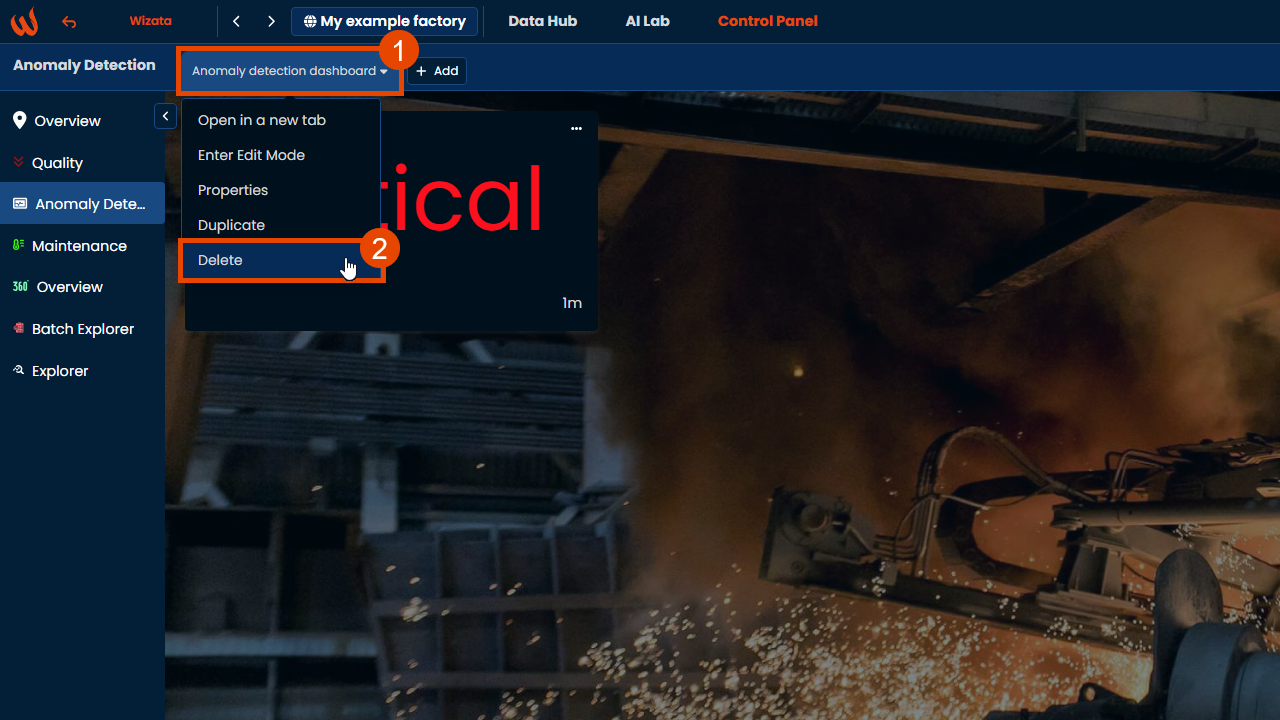
Deleting a component
To delete a component manually, open it and navigate to Settings > Delete
Alternatively, you can delete it programmatically by first retrieving it with .get_components(), and then passing the solution component ID to .delete_component()
# With .get_components()

dashboards = wizata_dsapi.api().get_components(
    label_id=ad_business_label_id,
    twin_id=twin_id,
    name="Anomaly Detection dashboard"
)

wizata_dsapi.api().delete_component(dashboards[0].solution_component_id)
# If you already know the component id
component_id = "0a313012-974e-4f0d-b526-08dd34990072"
wizata_dsapi.api().delete_component(component_id)Notes:
- The
.get_components()method returns a list of objects, not a single object.- The
.delete_component()method requires only the component's ID, not the full object.
In the following articles, we will explore the different types of components available on the platform and their functionalities.
Login assistance
Starting from version 11.1, you can activate the Login Assistance option to access your third-party integrated components—such as Grafana, Streamlit and Iframe—directly from the Control Panel. Admins can enable thsi feature by navigating to User Management>Users and selecting an user to edit.
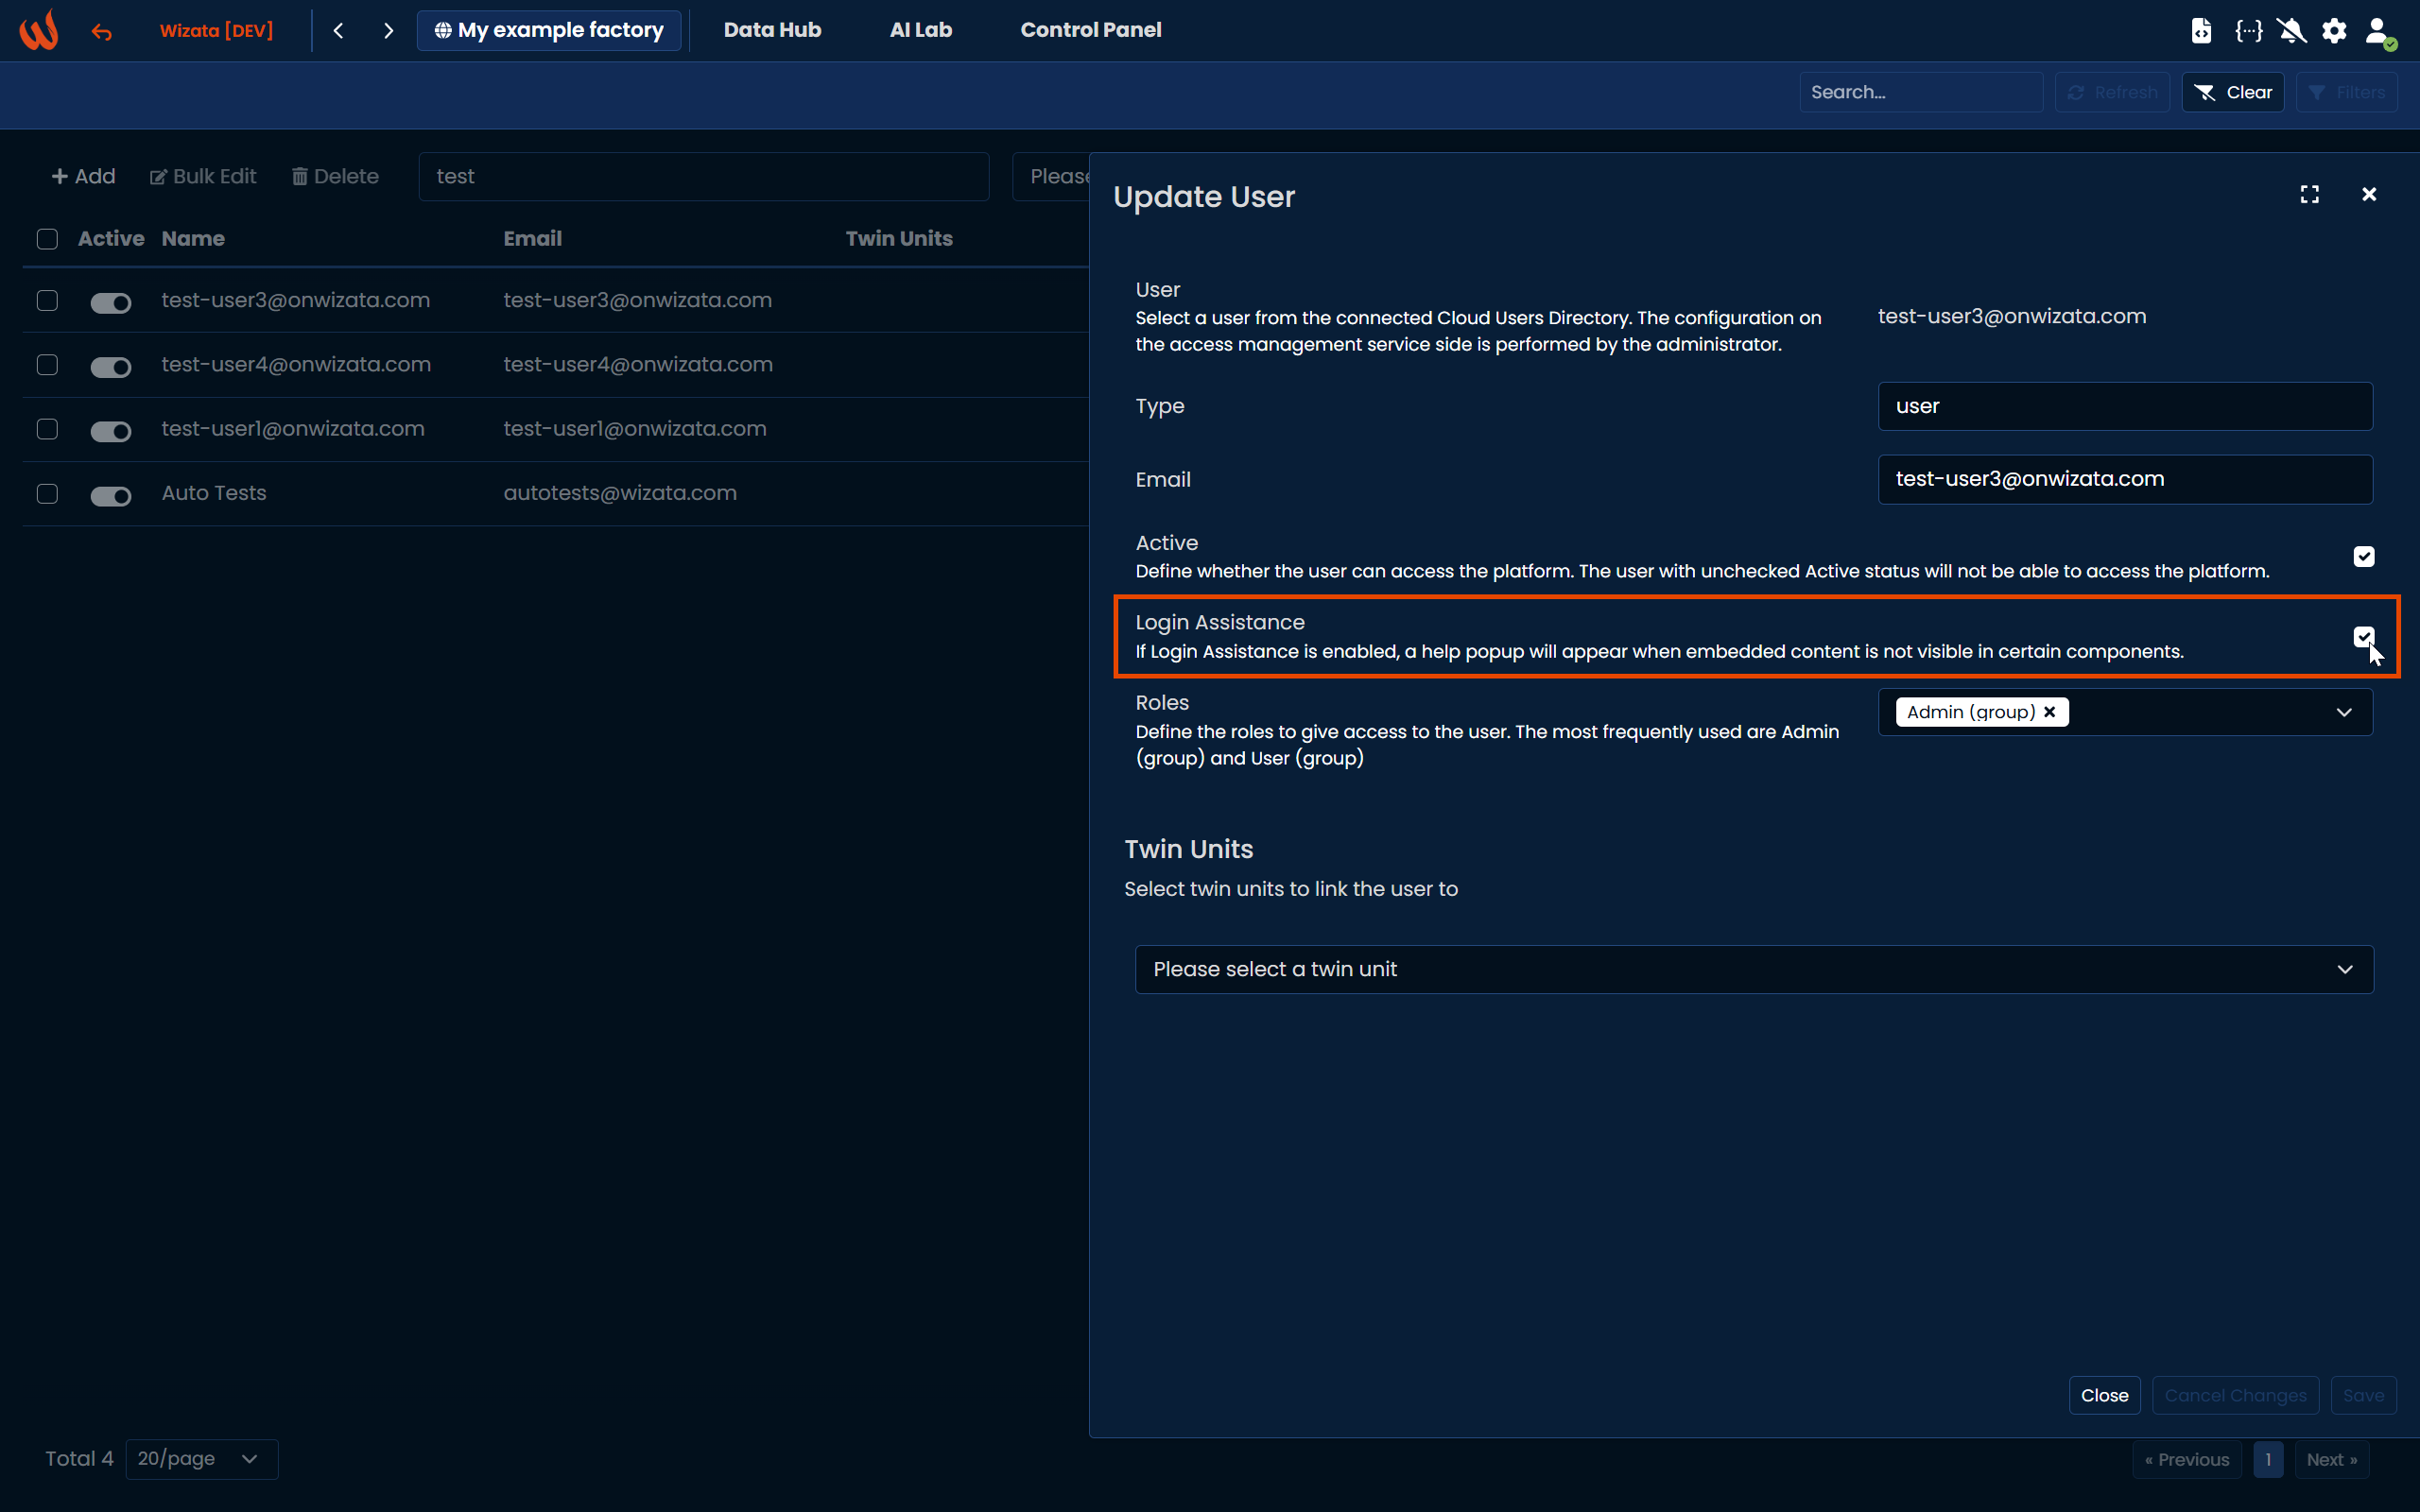
The option is disabled by default. Once enabled, your components will show a popup when embedded content is not visible.
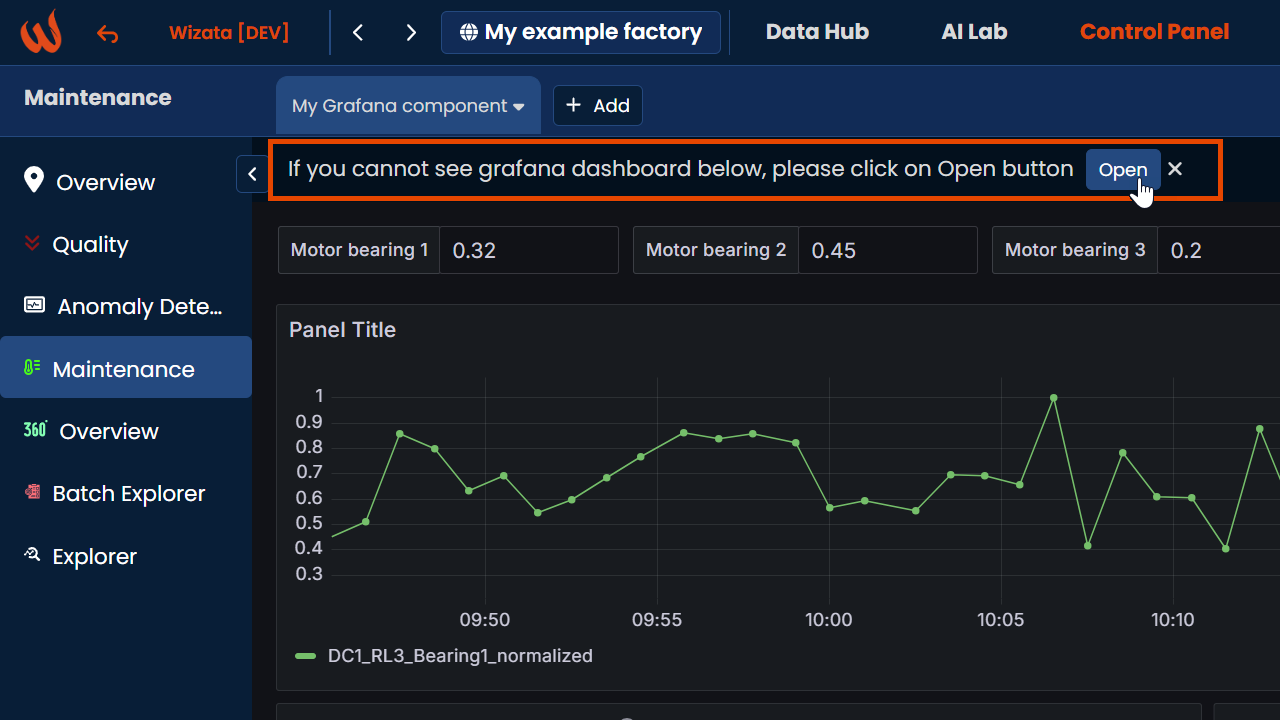
When clicking Open, do not close the popup window manually. It will close automatically after a few seconds, and the embedded content will be correctly displayed on the platform.
Updated 9 months ago